Blog

Articles

2-4.png
15/May/2021


Time being a precious commodity for all of us, regaining control of our health has never been more important. Sometimes we are so busy with our everyday lives that we forget to look after ourselves especially when it comes to managing our health. Much of the work we can do starts at home.


We are what we eat. 

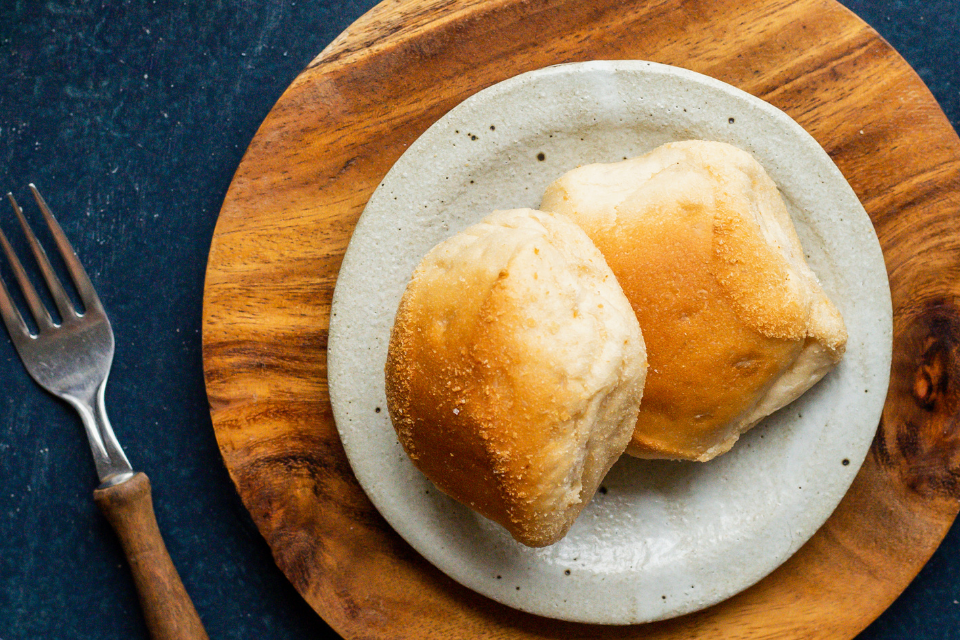
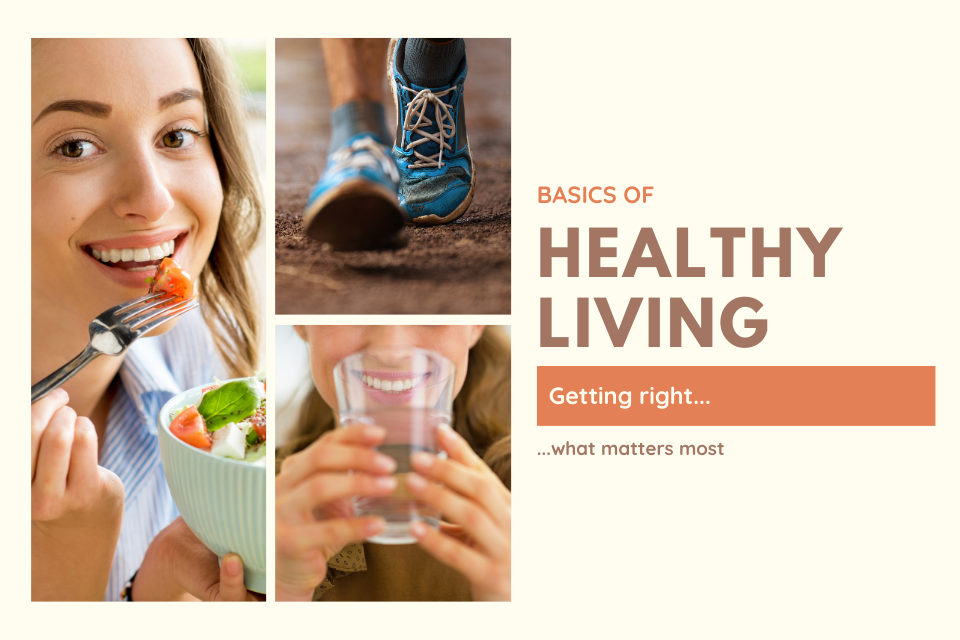
It is not about a single meal; it is about a balanced food choice over time that will make a difference. The food we eat can give our body the nutrients it need, make us feel good and protect our long-term health and well-being. The foods we choose are important, but so is the amount we eat. The number of kilo-joules (calories) we eat versus how many we burn by being physically active is one of the keys to keeping the body weight in check. Lots of “healthy foods” can have high levels of hidden salt and sugar we may need to watch out for. Aim for a balanced diet that includes all the main food groups, which has both physical and psychological benefits. When making healthy food choices, you are doing something positive for yourself and this can raise your self-esteem and improves mental health.


Balance is key when it comes to food and health. Eating well and staying healthy is a balancing act that takes effort and practice. Balance your weight by matching the food you eat with the physical activity you do. Energy we take in from what we eat and drink is measured in kilo-joules (KJ) and the number of kilo-joules needed is different for everyone. Balance the food you eat by eating mostly healthy foods your body needs. Make an effort to choose healthier foods more often to get the balance right.

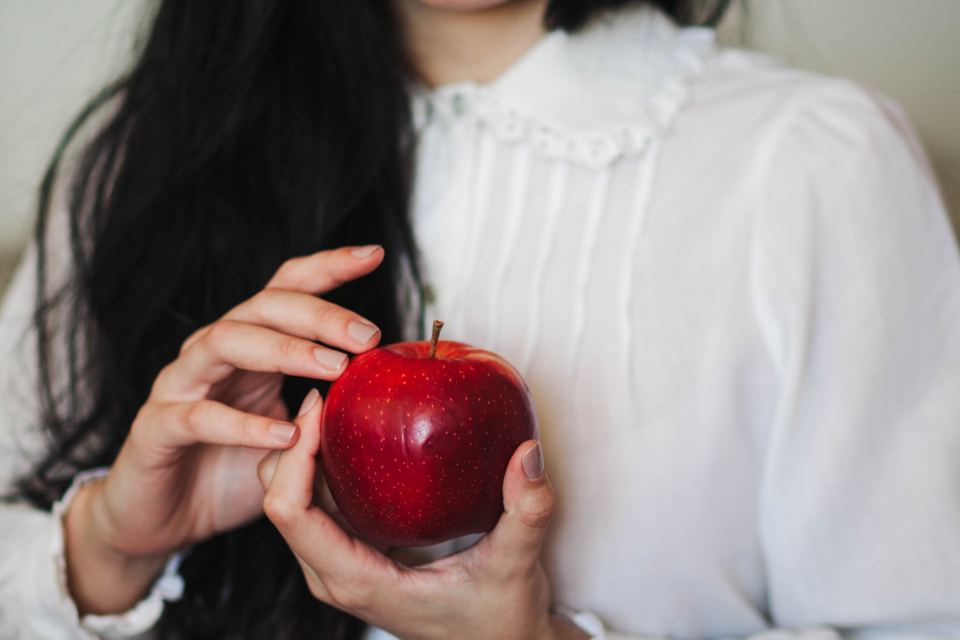
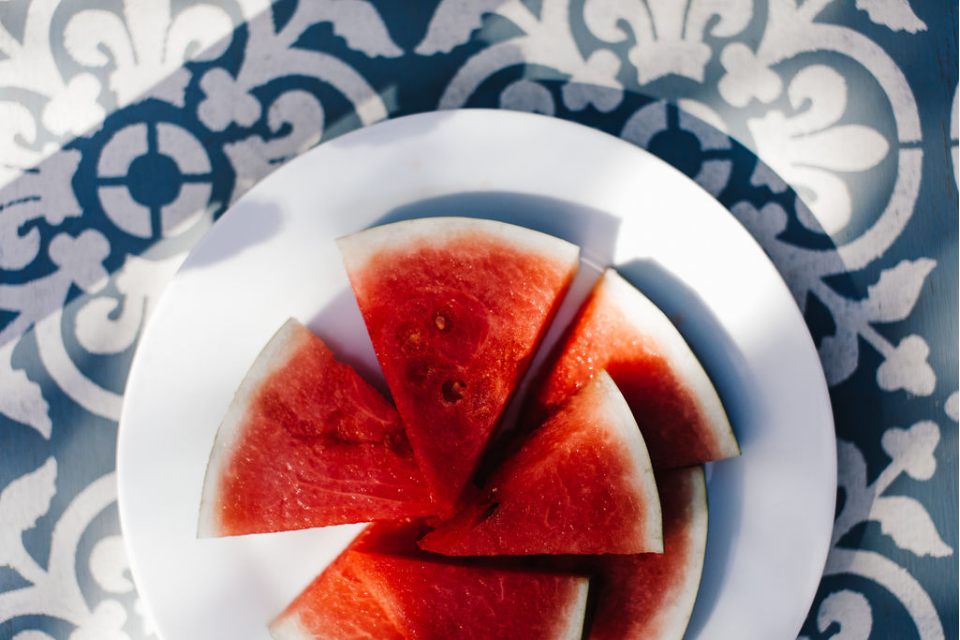
Variety is the spice of life, and it’s certainly an important goal when it comes to eating well. Enjoy foods from healthy food groups every day to give your body the nutrients it needs. It is also good to enjoy a variety of different foods from within the food groups themselves to keep meals interesting and to give you a broad range of nutritional benefits. For most people, a healthy diet is high in vegetables, fruit, whole grains, and lean protein. Most people should also have some healthy fats, such as olive oil. Ask your HealthySpan consultant on what diet is right for you.

Think about drinks as drinks count: Choose those which can add nutrients (such as calcium from milk) and avoid or reduce those that just add kilo-joules we don’t need (such as sugar-sweetened drinks). Less sugar, more water.

Water is best, and drinking water is a healthy habit for the whole family.  Avoid alcohol as no amount of alcohol is good for your health. Taking charge of your health is something you can do at any age, and can be as easy as starting your day off with a glass of water. Water first thing in the morning will also help re-hydrate you and will flush out toxins, leaving you feeling refreshed and energized to tackle the day ahead.

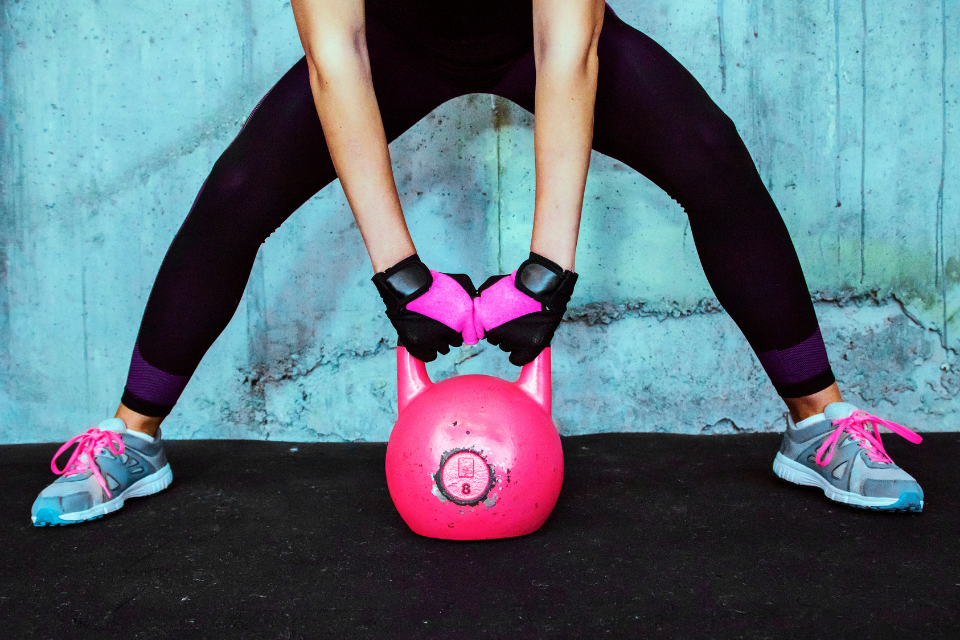
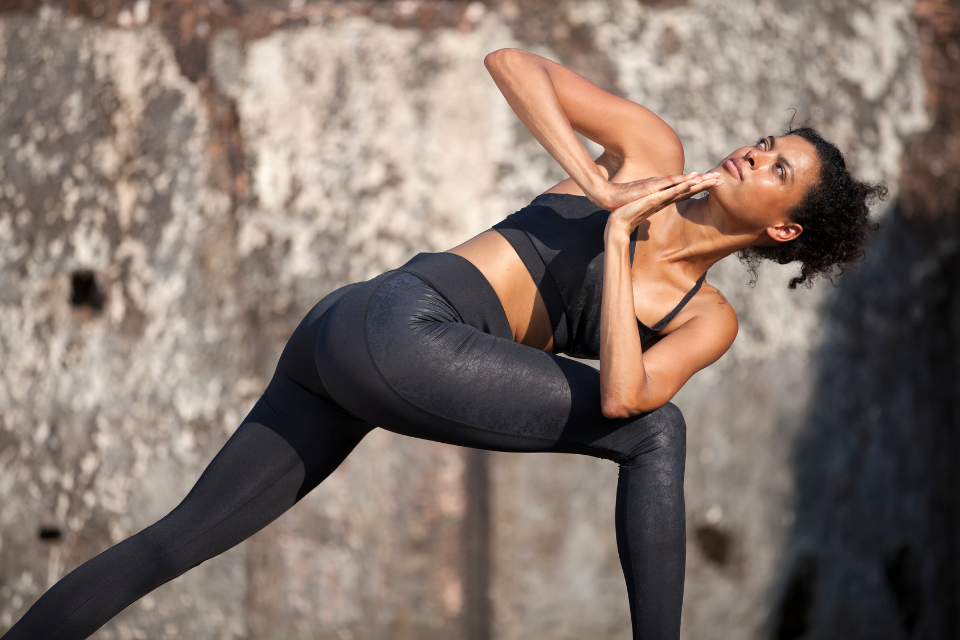
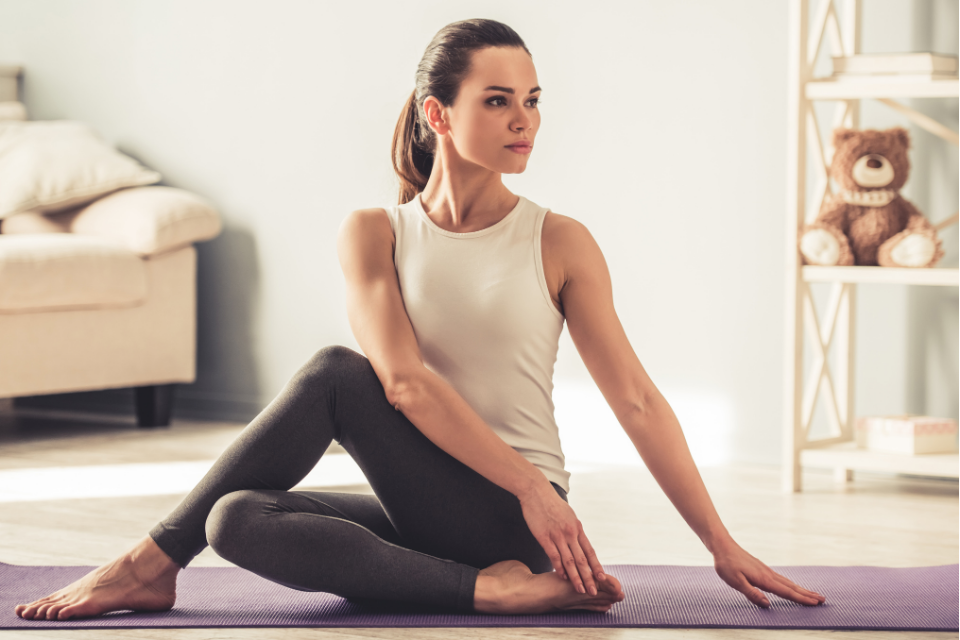
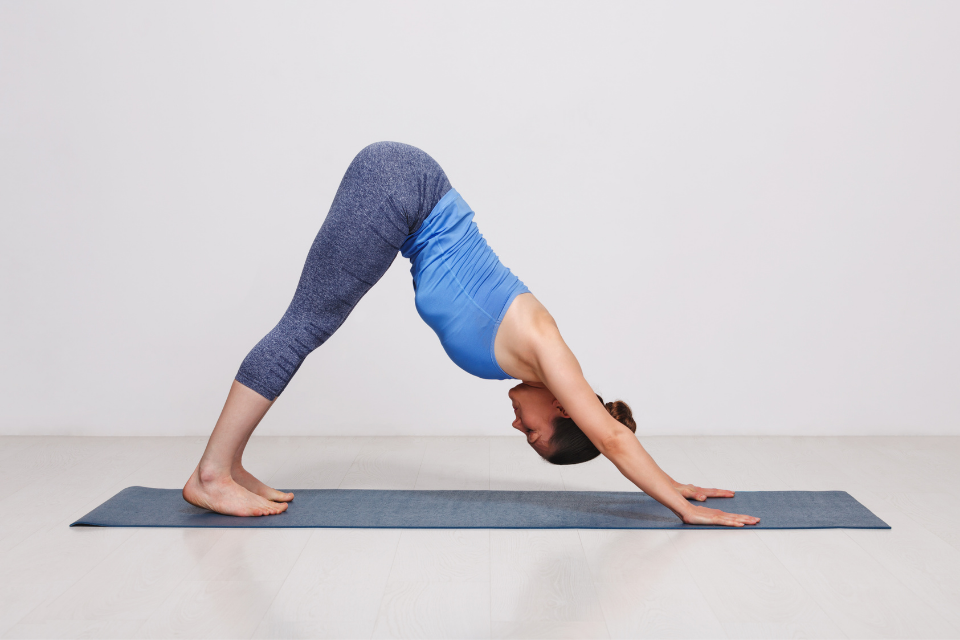
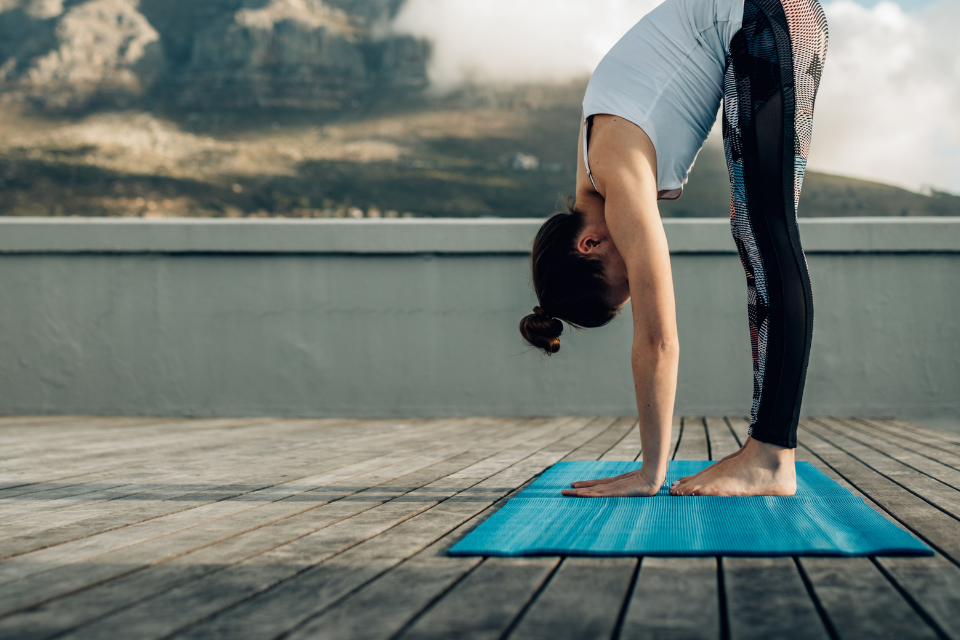
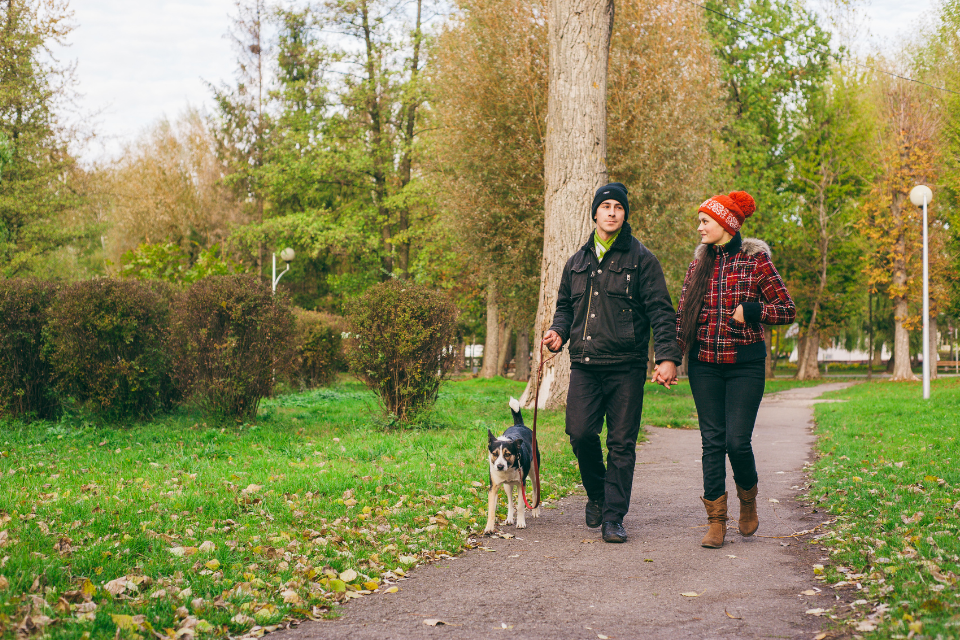
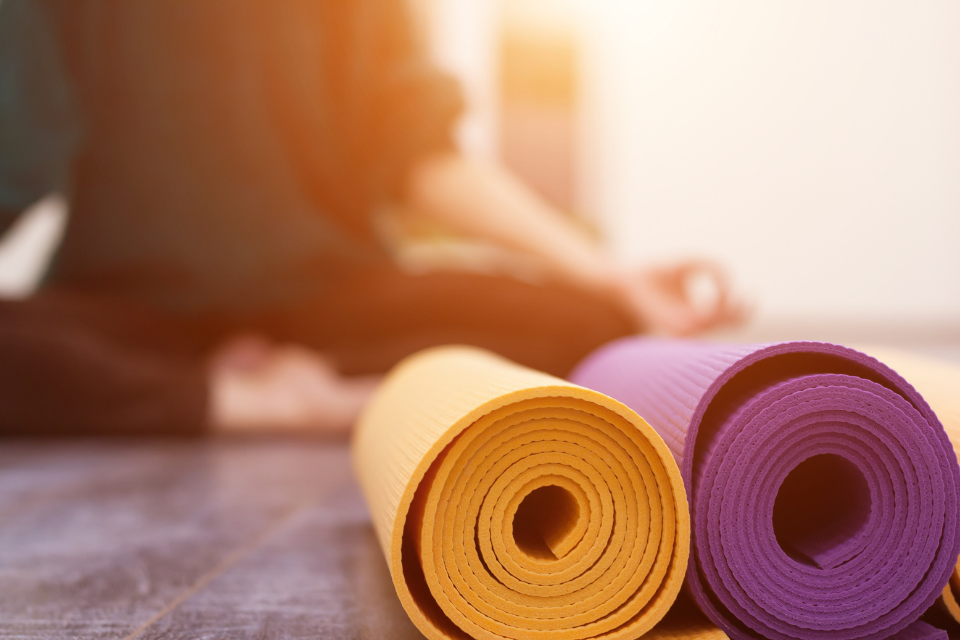
Stress – High levels of stress can lead to a number of serious health problems, so if you have a lot of stress in life, we strongly recommend reducing it. Managing your stress can be a gradual process. Introducing regular exercise to your lifestyle is a good first step, and trying to make more time for yourself can help, too. Incorporating a little exercise into your daily routine can reap countless benefits, even if it’s something as simple as walking.

Get enough rest.

Adequate sleep is a must for good health and helps in reducing stress and maintaining your overall health. Chronic sleep deprivation raises the odds for heart disease, diabetes, stroke, obesity, and many other sicknesses. Driving while sleepy is just as bad as driving drunk. If you don’t usually wake up feeling refreshed, try slipping into bed 15 minutes earlier every week until you do. Seven to eight hours a night is the average amount an adult needs to reboot both mind and body.

Mental health is just as important as physical health, so make sure to take time for yourself. Make time for a 20-minute bath before bed, which can help you feel more relaxed and better equipped to deal with the stresses of day-to-day life.

It is always beneficial for individuals to communicate, with friends, family members rather than distancing and getting slaved to hand held devices. Socializing is very important to manage and reduce stress. Stay in touch with family and friends. Be involved in your community. Maintain a positive attitude and do things that make you happy. Keep your curiosity alive. Lifelong learning is beneficial to your health.

Don’t do it alone. Whatever your health goals are, it will be far easier to reach them if someone has your back. That might mean finding an exercise buddy who meets you at the gym, asking a friend to go with you, or simply confiding in someone you trust about your current struggles so they can cheer you on along the way.
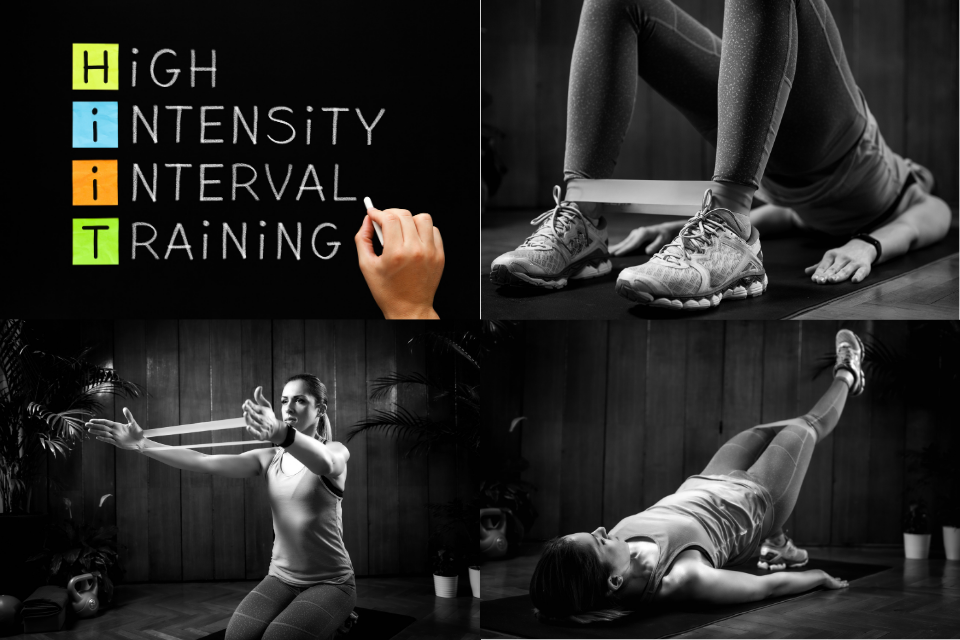
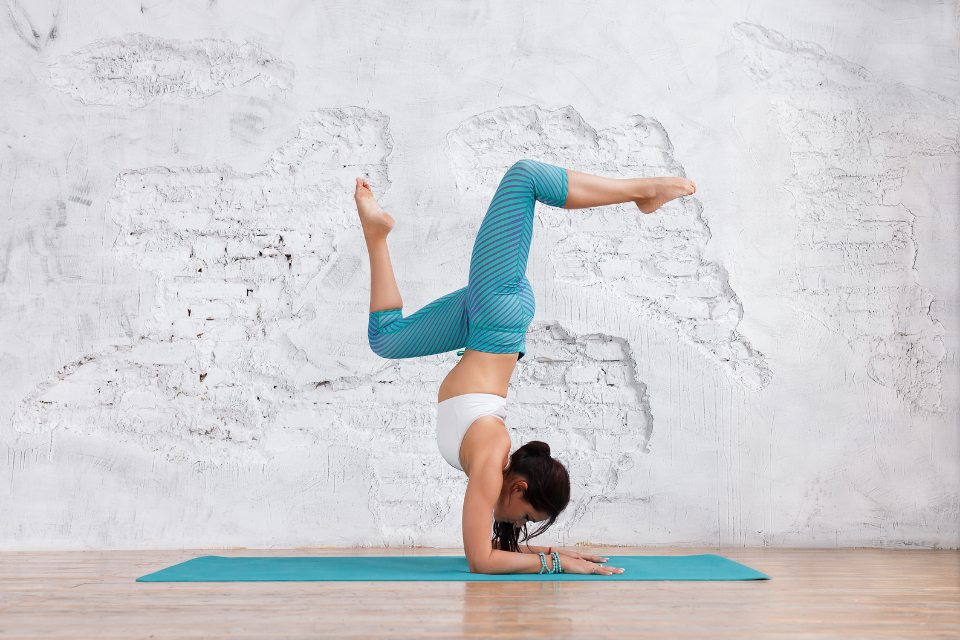
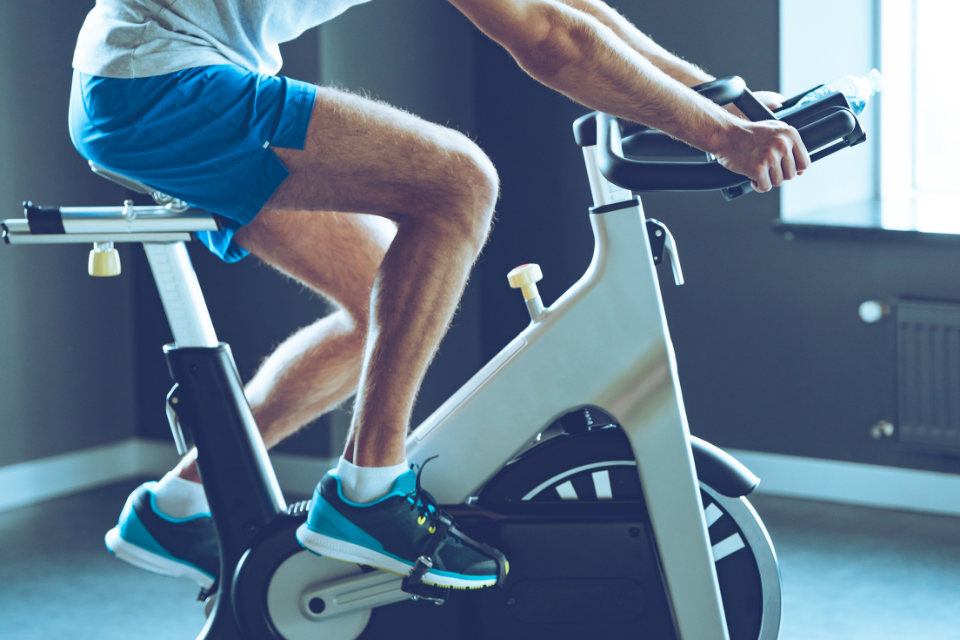
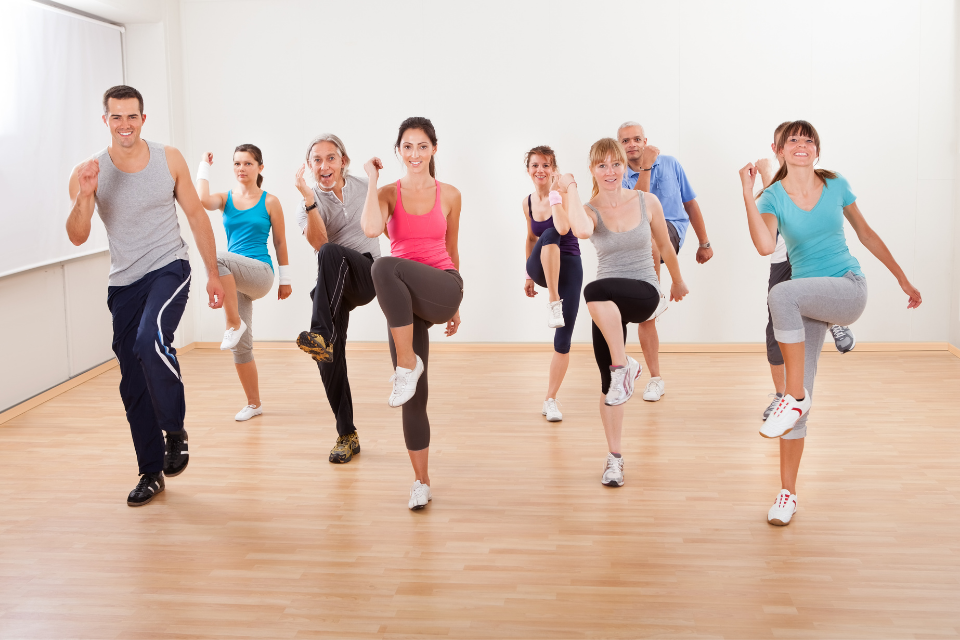


Exercise

Move more; sit less, that’s the physical activity guidelines in a nutshell

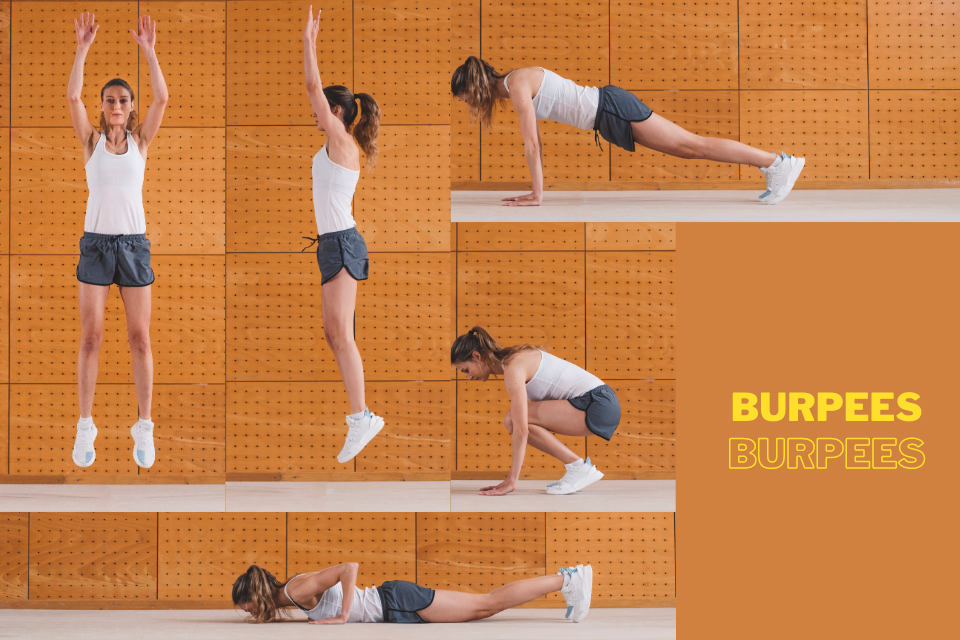
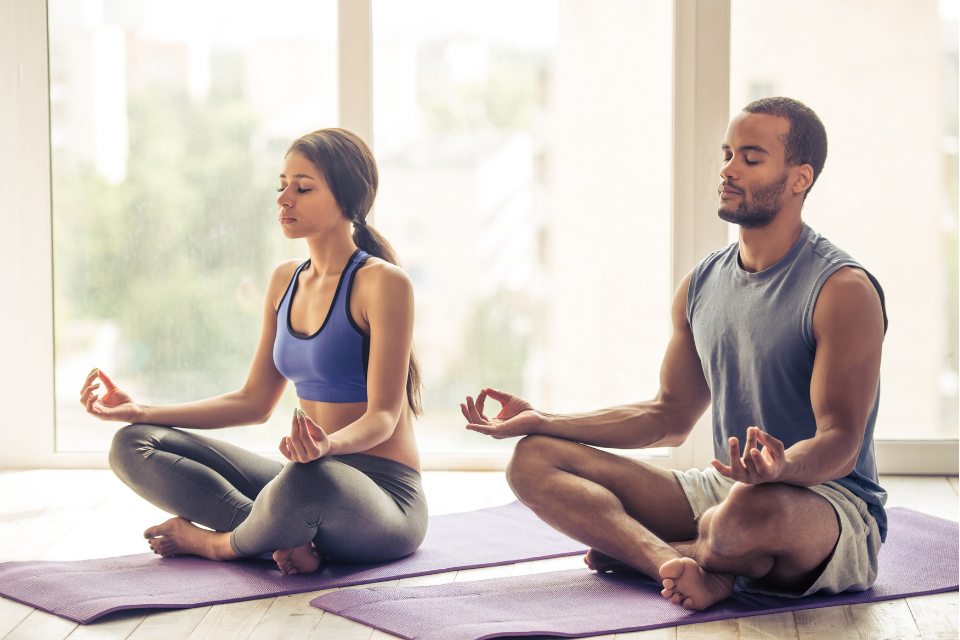
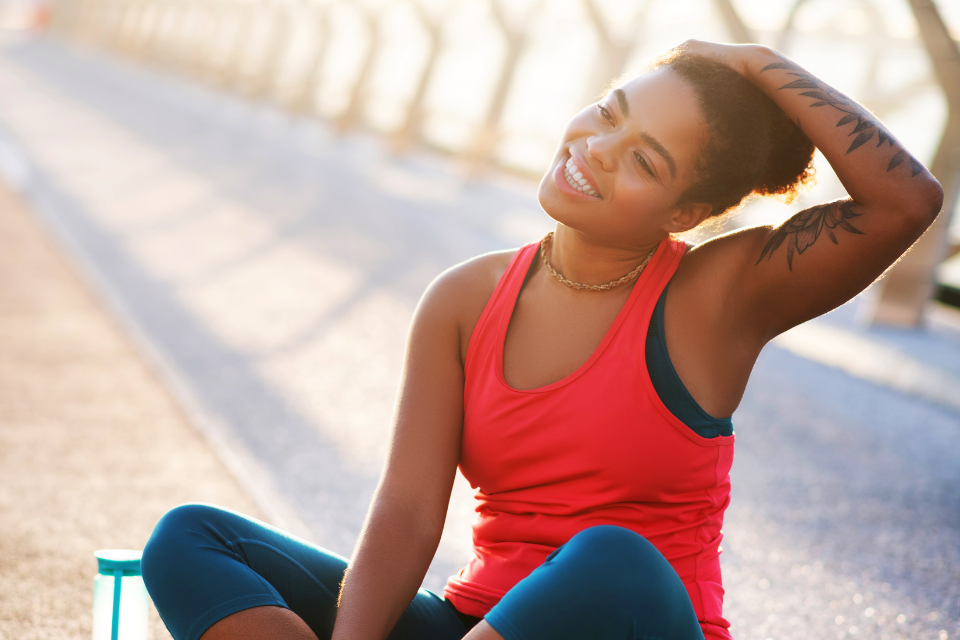
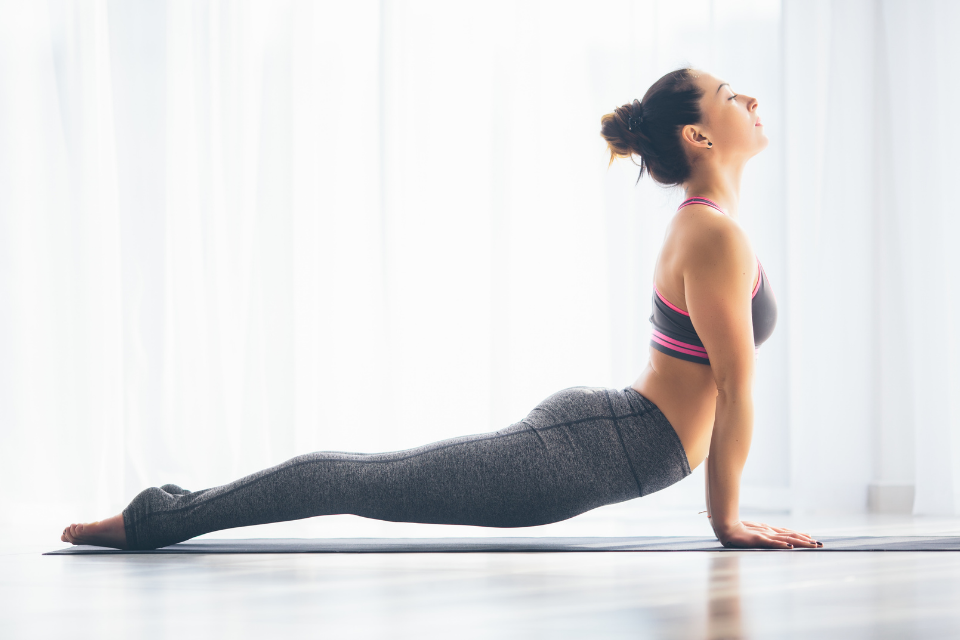
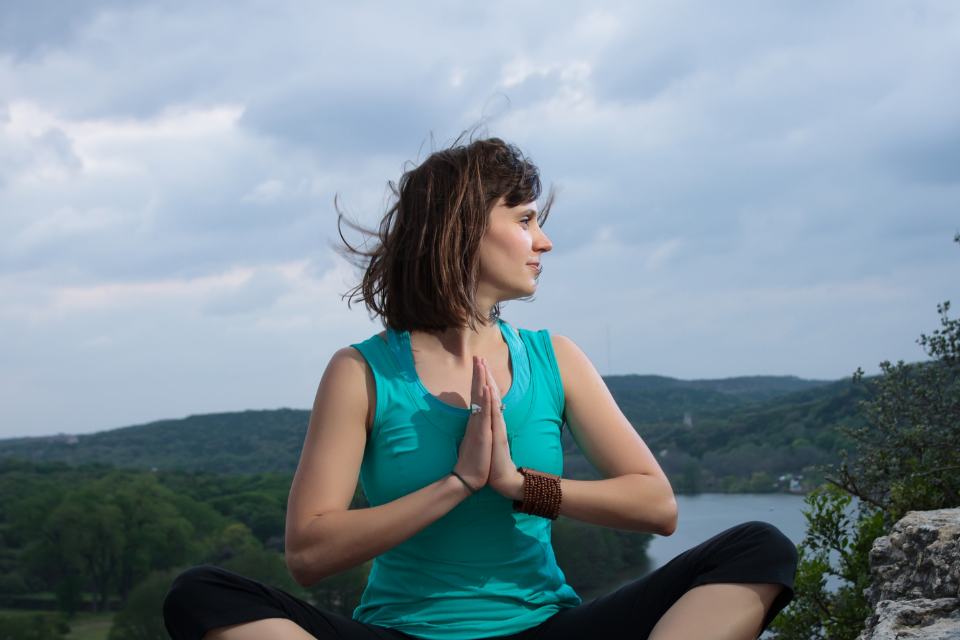
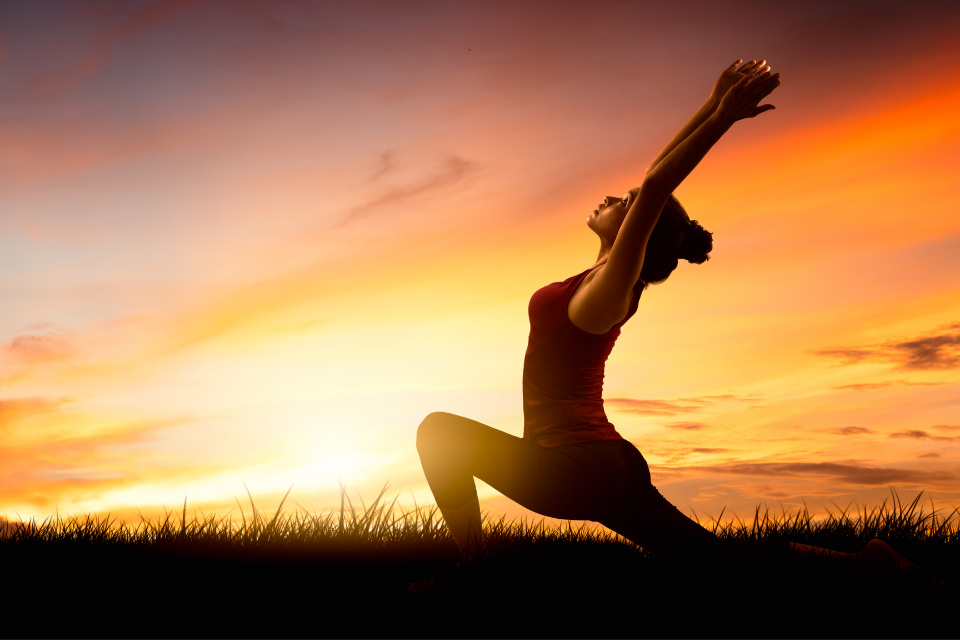
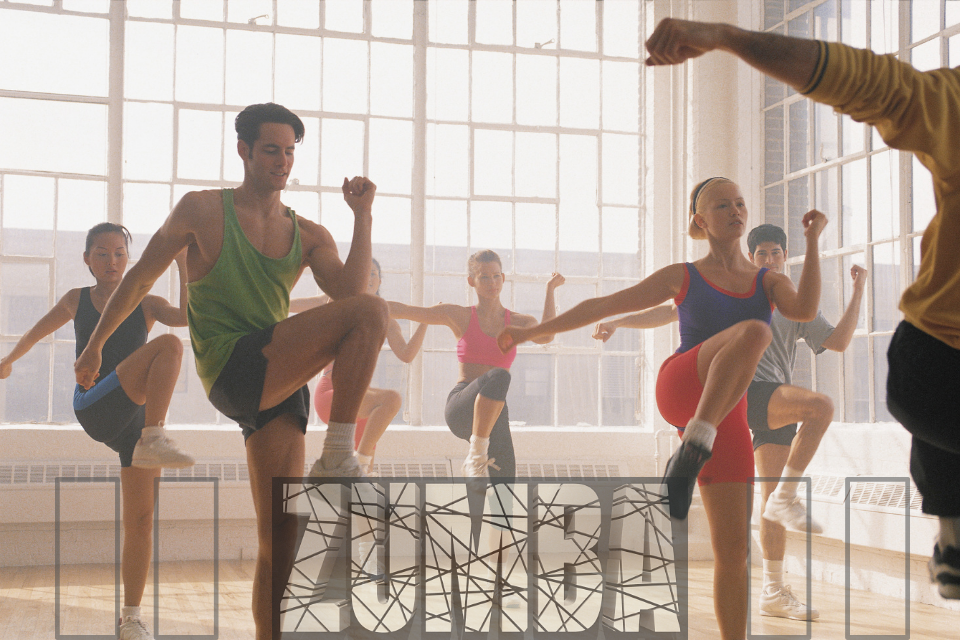
Adding moderate exercise into your daily life is not only good for mind and body, it can also be a great way to socialise and see friends. Choose an exercise that you enjoy and it is always beneficial to exercise with a friend or listen to music. Even moderate exercise has many benefits including helping you sleep better, boosting your energy and improving your mental, as well as physical, well-being. If you’re trying to reach a healthy weight, exercise will help. Note that any movement is better than nothing

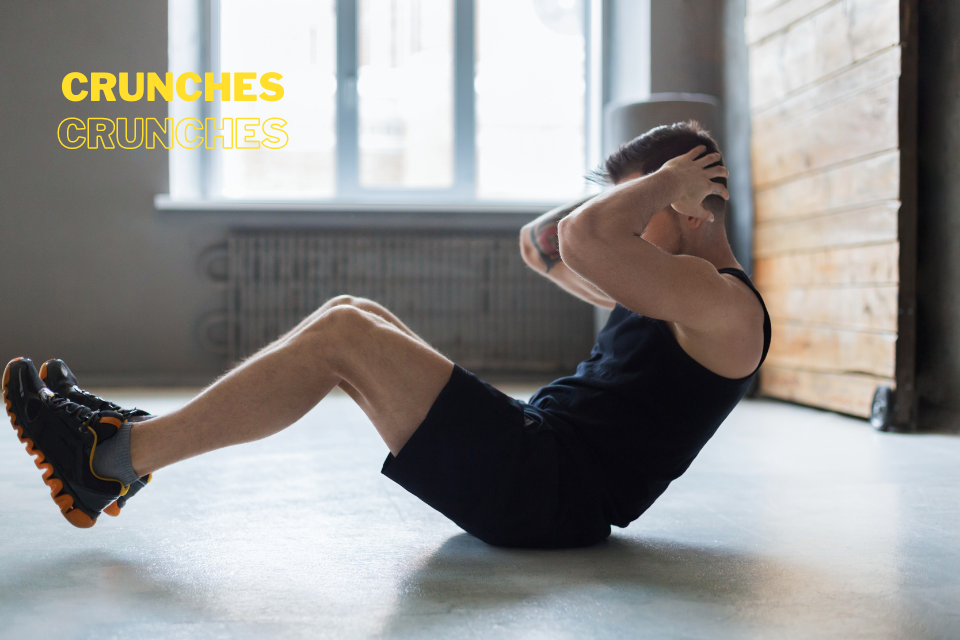
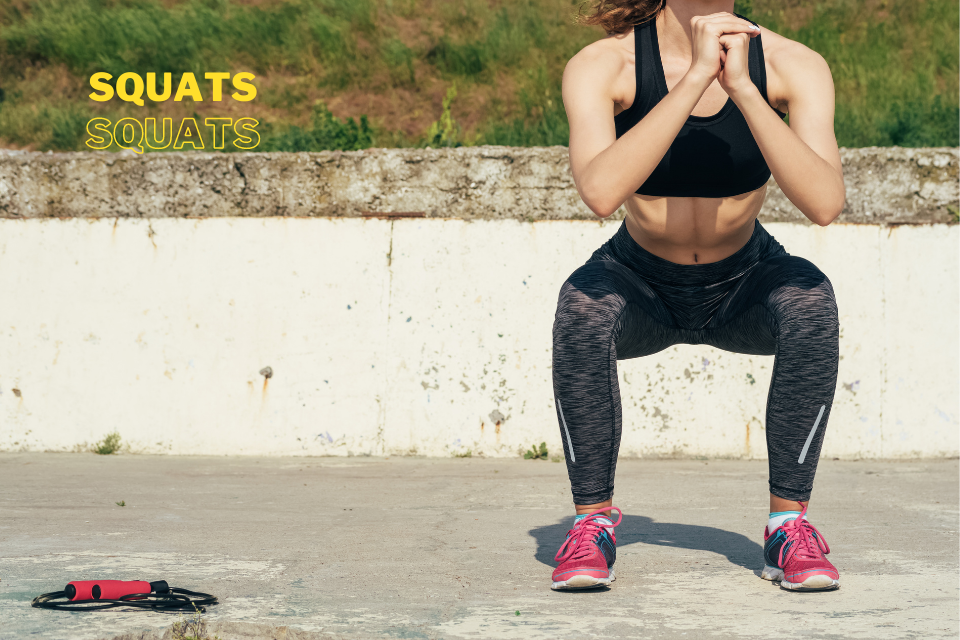
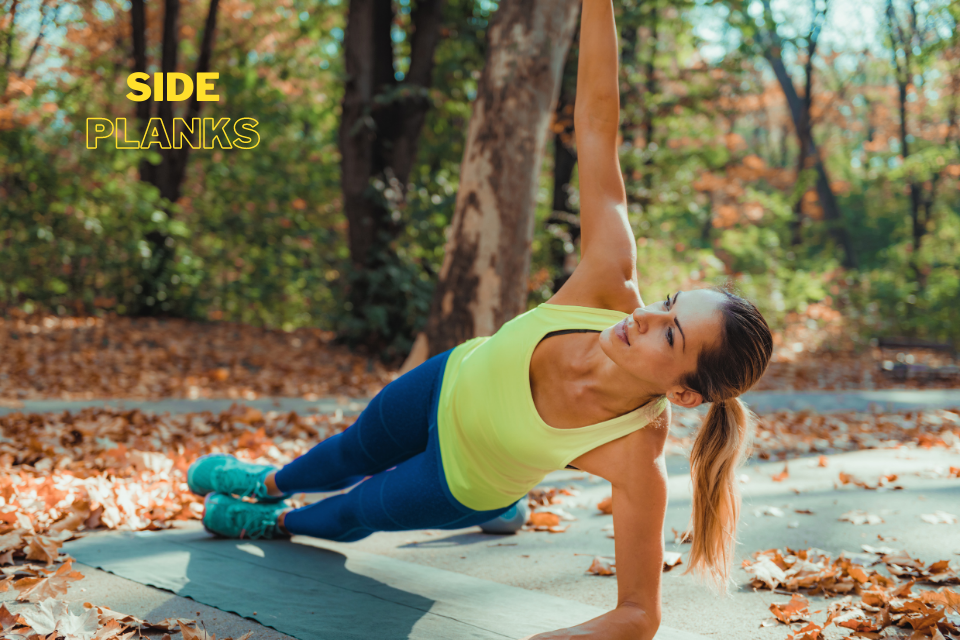
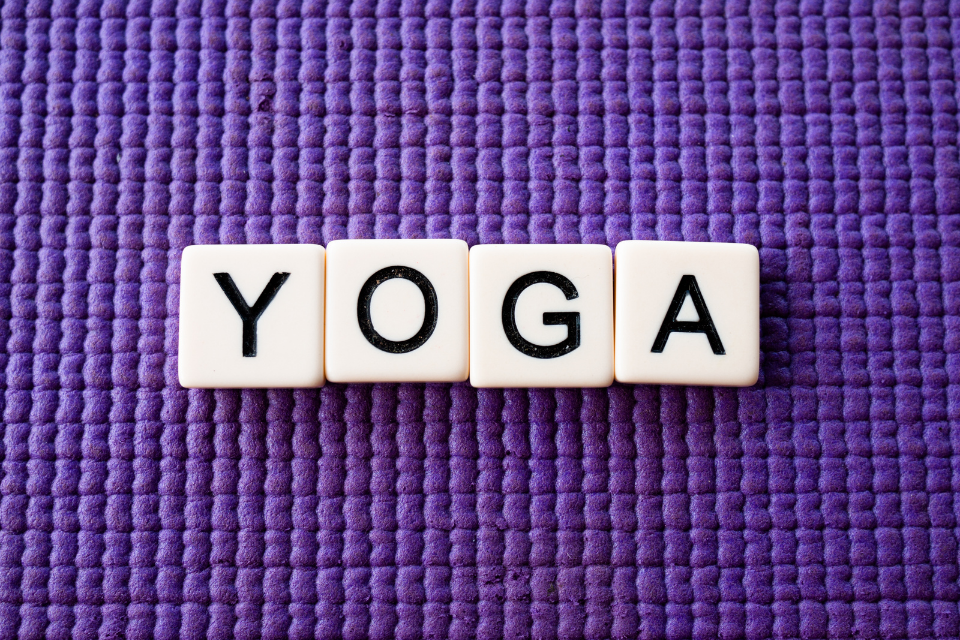
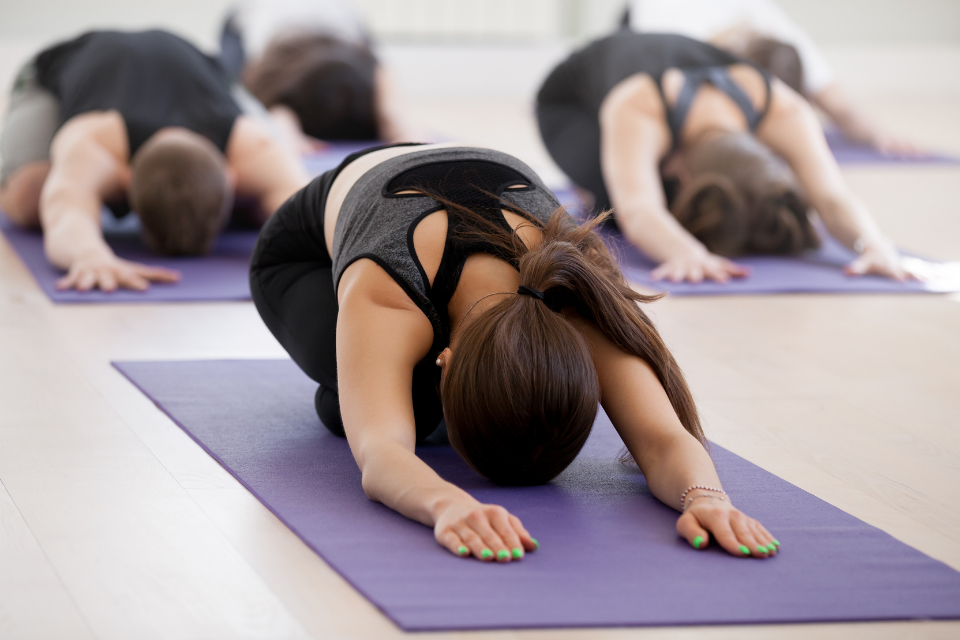
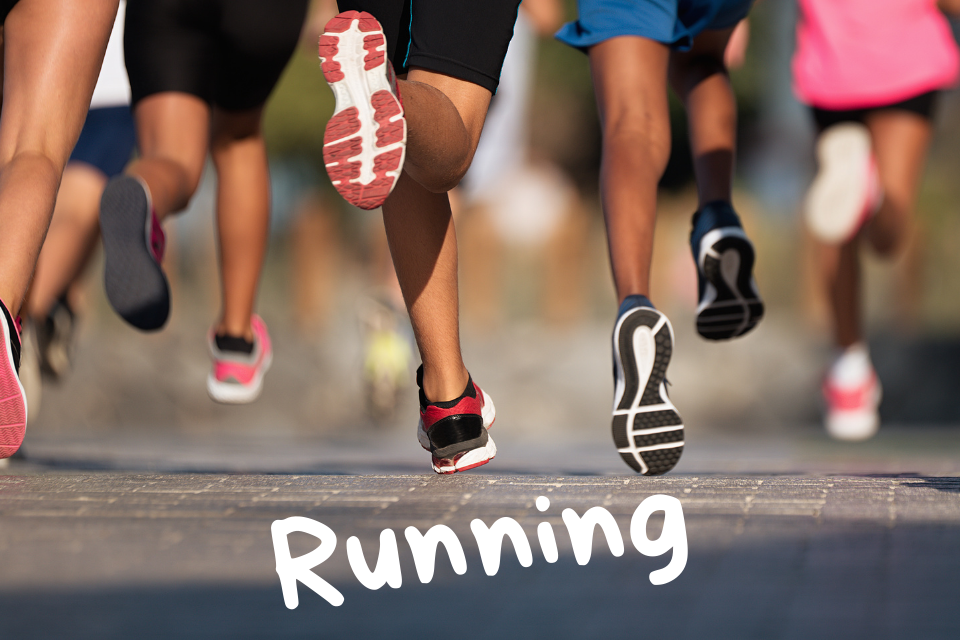
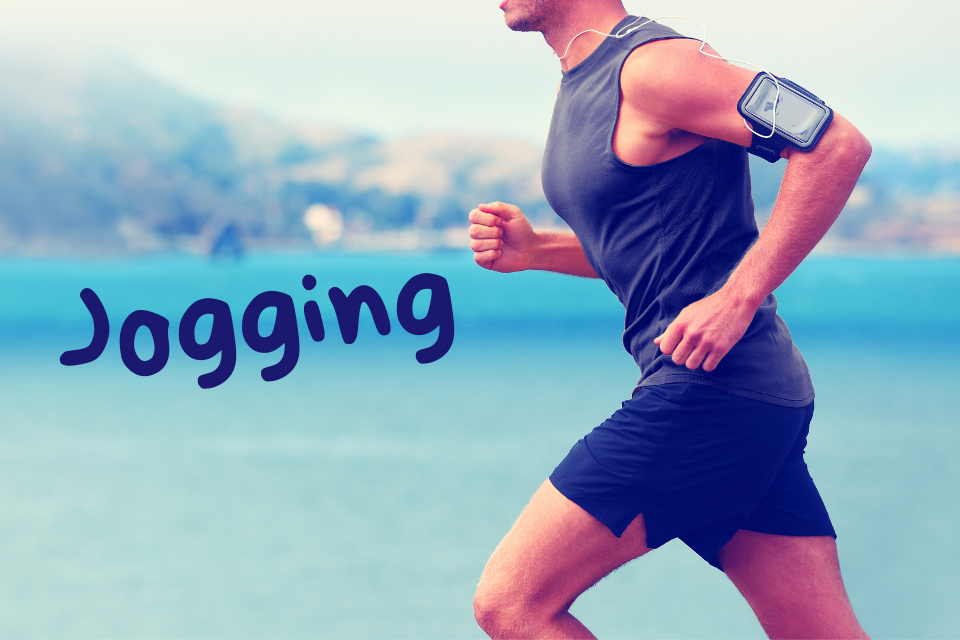
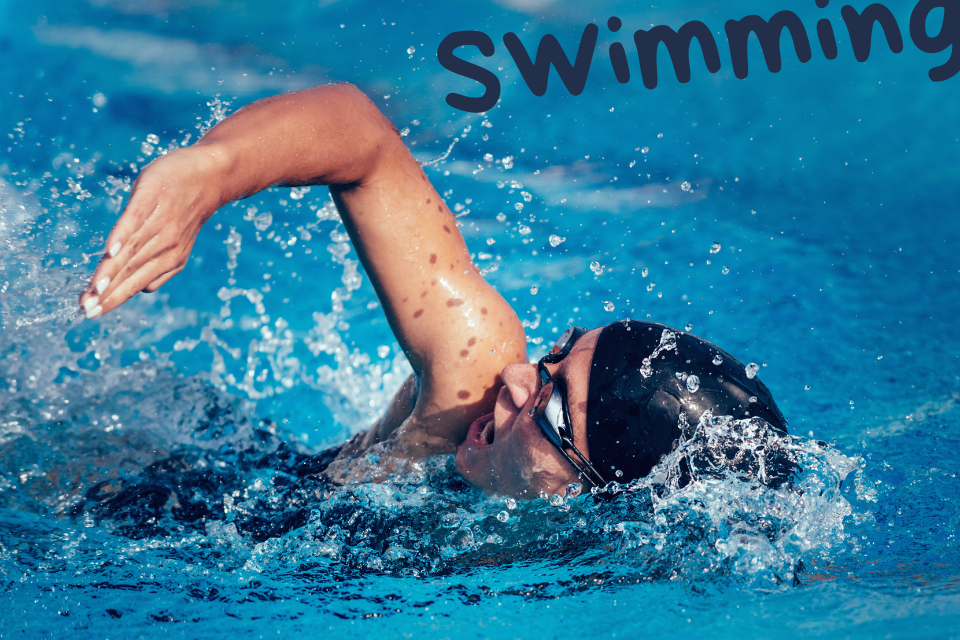
The best approach is to start slowly and build up. Walking, swimming, dancing and yoga are all good ways to get moving and improve strength, stamina and flexibility. Few surveys have revealed that walking is the most popular form of exercise undertaken a few times a week .You’re actually getting, probably, 95% or more of the benefits when you’re walking as compared to jogging.

Be active through moderate exercise at least 30 minutes a day, five days a week. For instance, take a brisk walk. Once you reach that goal, add some strength exercises a few days each week. These build muscles. Also add some stretching exercises, these help you stay limber.

Few Keys to Good Health

Brush your teeth at least twice a day with soft or medium bristled toothbrush (once u wake up and before going to bed)

Stay up to date on vaccines. Grownups need shots, too. You should get a flu shot every year. Immunisation protects by helping to control serious infectious diseases.

Wash your hands. It’s one of the easiest and most effective ways to avoid catching whatever contagious bugs are going around. The key is to be thorough: After you lather up with soap, scrub your palms, the backs of your hands, between your fingers, and under your nails for at least 20 seconds

Give your skin access to healthy dose of the sun’s rays and you are likely to experience some tangible benefits immediately like increased Vitamin D, improved mood, higher quality sleep, stronger bones, lower blood pressure

Limit alcohol drinking. It’s true that moderate amounts of alcohol have been tied to some health benefits, like a lower risk of heart disease, but there are also serious downsides to drinking, such as a higher risk of cancer and liver disease. So you shouldn’t start drinking for the sake of good health.

Steer clear of smoke. Smoking doesn’t just hurt your lungs. It harms almost every organ in your body, making you a more likely target for cancer, heart disease, and other serious illnesses. Second-hand smoke is dangerous, too, and there’s no amount that’s “safe.” If you live with a smoker, support them in quitting or at least ask them to take it outside


Take baby steps.

It’s tempting to overhaul entire lifestyle at once. But tackling too many health goals at once often backfires because change can be hard. To better your odds of getting and staying healthier, make a series of small changes and work your way up to a bigger end game. For instance, if you’d like to eat a more nutritious diet, focus on breakfast. Once you get used to that, think about how to improve your lunch menu.

Healthy habits can help you have a long, healthy and happier life.


5-2.png
07/Dec/2020


We first make our habits, and then our habits make us – John Dryden.


Most of us would have heard this quote and this is applicable to our health as well. We first make our lifestyle habits and our lifestyle habits make our health.

What are the lifestyle habits?

Our lifestyle habits comprise of numerous things, such as

  • The food we eat
  • Our sleep duration and quality
  • Our temptation or even addiction to caffeine, sweets, smoking and alcohol
  • How often we laugh
  • How often we exercise
  • Our vacation time
  • Our working routines and workplace relationships
  • Our family relationships
Broadly, we can classify them into four categories
  1. Diet & Nutrition
  2. Exercise
  3. Sleep/Rest and
  4. Positive Mental Health.

Most of the time, these 4 are interrelated. One affects the other. Say if one does not have a proper sleep, it is unlikely that he/she will do exercise or take the right nutrition or be with a positive attitude the next day. Similarly, when one has a stressful time at office, it is unlikely that he/she will be able to sleep well or focus on a nutritious diet or exercise. Similarly, if we fix one in a positive way, it will also impact the other areas in a positive way. Say if one had a stressful day at office, but still he/she went for a quick jog for 30 minutes, the body automatically releases endorphins that interact with the receptors in brain and reduce your perception of stress. So, the good news is that, just by fixing one of these 4 areas, it is easy to fix all the 4 areas of healthy lifestyle habits.

Let’s look at these 4 pillars of health in a bit more detail.


Get the Basics of Exercise

Sleep / Rest

Sleep is very important as your body repairs itself during sleep. A good quality sleep strengthens the immune system, reduces the risk of diseases, lowers blood pressure, keeps heart healthy, improves memory, controls weight, curbs inflammation, spurs creativity, sharpens  attention, makes you more energetic and  happier, reduces anxiety and depression, keeps the skin healthier and attractive. The amount of sleep required may vary from person to person according to their lifestyle. In general, sleeping early and maintaining a good 6 to 8 of sleep hours is recommended.


Positive Mental Attitude

Having a positive mental attitude is very important to our overall well-being. When our attitude is not positive, our body undergoes a stressful situation. A well-balanced diet, exercise and good sleep are important to gain a positive mental attitude. You can also learn to handle stress by planning and organizing activities well in advance, learning to let go of things that cause unhappiness and cannot be changed, meditating for a few minutes, focusing on the future instead of the past, deferring your response to complex situation by a few seconds or a few minutes and so on.


Diet and Nutrition

Diet and nutrition are two factors that we need to know about, and it is important to recognize the difference between the two. The best way to define diet is the food that a person habitually eats, and nutrition is food that our bodies need to consume daily to function optimally. Food sustains life and living beings. Complexion, clarity, good voice, longevity, genius, happiness, satisfaction, nutrition, strength and intellect are all conditioned by food. A few things that we need to take care in our diet are eating fresh food, eating a balanced diet, eating at the right time, supplementing our diet and the way we eat.


Exercise

The benefits of a modest exercise program include:

  • Weight Loss
  • Lower blood pressure
  • Stronger bones and decreased risk of osteoporosis
  • Lower cholesterol levels
  • Elevated levels of HDL
  • Decreased levels of LDL
  • Decreased levels of Triglycerides
  • Increased strength and co-ordination, which leads to decreased risk of falls
  • Improved sensitivity to Insulin
  • Enhanced immune system
  • Overall increased sense of well-being

1
4
5
6
7
2
3
23/Jul/2020

Interval training combines short, high-intensity bursts of speed or intensity (from 10 seconds to three minutes) interspersed with slow recovery phases. The fast and slow intervals are repeated throughout the workout. Interval training can either be casual and unstructured or specific and structured. Modern life has a way of making us feel time-crunched and pressured to find the most efficient ways of using the precious hours when we’re not sleeping.


2-2.png
15/Apr/2020

What is Yoga?

Yoga is essentially a spiritual discipline based on an extremely subtle science which focuses on bringing harmony between mind and body. It is an art and science for healthy living. The word “Yoga” is derived from the Sanskrit root yuj meaning “to join”, “to yoke” or “to unite”. According to Yogic scriptures, the practice of Yoga leads to the union of individual consciousness with universal consciousness.

The Fundamentals of Yoga

Yoga works on the level of one’s body, mind, emotion and energy. This has given rise to four broad classifications of Yoga: Karma Yoga where we utilise the body; Jnāna Yoga where we utilise the mind; Bhakti Yoga where we utilise the emotion and Kriya Yoga where we utilise the energy. Each system of Yoga we practice falls within the gamut of one or more of these categories


Yogic practices for health and wellness

The widely practiced Yoga sadhanas are: Asana & Pranayama,

Pranayama consists of developing awareness of one’s breathing followed by wilful regulation of respiration as the functional or vital basis of one’s existence. It helps in developing awareness of one’s mind and helps to establish control over the mind. In the initial stages, this is done by developing awareness of the “flow of in-breath and out-breath” (svasa-prasvasa) through nostrils, mouth and other body openings, its internal and external pathways and destinations.

Later, this phenomenon is modified, through regulated, controlled and monitored inhalation (svāsa) leading to the awareness of the body space getting filled (puraka), the space(s) remaining in a filled state (kumbhaka) and it is getting emptied (rechaka) during regulated, controlled and monitored exhalation (prasvāsa).

Guiding principles given below while performing Yogic practices:

  1. Sauca means cleanliness – an important prerequisite for Yogic practice. It includes cleanliness of surroundings, body and mind.
  2. Yogic practice should be performed in a calm and quiet atmosphere with a relaxed body and mind.
  3. Yogic practice should be done on an empty stomach or light stomach. Consume small amount of honey in lukewarm water if you feel weak.
  4. Bladder and bowels should be empty before starting Yogic practices.
  5. A mattress, Yoga mat, durries or folded blanket should be used for the practice
  6. Light and comfortable cotton clothes are preferred to facilitate easy movement of the body.
  7. Yoga should not be performed in state of exhaustion, illness, in a hurry or in acute stress conditions.
  8. In case of chronic disease/ pain/ cardiac problems, a physician or a Yoga therapist should be consulted prior to performing Yogic practices.
  9. Yoga experts should be consulted before doing Yogic practices during pregnancy and menstruation.

During the practice

  1. Practice sessions should start with a prayer or invocation as it creates a conducive environment to relax the mind.
  2. Yogic practices shall be performed slowly, in a relaxed manner, with awareness of the body and breath.
  3. Do not hold the breath unless it is specially mentioned to do so during the practice.
  4. Breathing should be always through the nostrils unless instructed otherwise.
  5. Do not hold body tightly or jerk the body at any point of time.
  6. Perform the practices according to your own capacity.
  7. It takes some time to get good results, so persistent and regular practice is very essential.
  8. There are contra-indications/ limitations for each Yoga practice and such contra-indications should always be kept in mind.
  9. Yoga session should end with meditation/ deep silence / Shanti paṭha.

After practice

  1. Bath may be taken only after 20-30 minutes of practice.
  2. Food may be consumed only after 20-30 minutes of practice.

How yoga can help

  1. Yoga is essentially a path to liberation from all bondage. However, medical research in recent years has uncovered many physical and mental benefits that Yoga offers, corroborating the experiences of millions of practitioners. A small sampling of research shows that:
  2. Yoga is beneficial for physical fitness, musculoskeletal functioning and cardio-vascular health.
  3. It is beneficial in the management of diabetes, respiratory disorders, hypertension, hypo-tension and many lifestyle related disorders.
  4. Yoga helps to reduce depression, fatigue, anxiety disorders and stress.
  5. Yoga regulates menopausal symptoms.
  6. In essence, Yoga is a process of creating a body and mind that are stepping-stones, not hurdles, to an exuberant and fulfilling life.

1.Prayer

Yogic Practice shall start with a prayer or prayerful mood to enhance the benefits of practice.

2. Loosening Practices 

The loosening practices help to increase micro-circulation. These practices can be done while standing and sitting.


Neck Bending

Sthiti: Samasthiti (Alert Posture)

Stage – i: (Forward and Backward Bending)

  1. Stand with the feet comfortably apart. Keep the hands straight beside the body. This is Samasthiti. This is also called. Keep your arms on the waist.
  2. While exhaling, move the head forward slowly and try to touch the chin to the chest.
  3. While inhaling, move the head as far back as is comfortable.
  4. This is one round: repeat 2 rounds.

Stage – ii: (Right and Left bending)

  1. While exhaling, bend the head slowly to the right; bring the ear as close as possible to the shoulder without raising the shoulder.
  2. While inhaling, bring the head to normal position.
  3. Similarly, while exhaling, bend the head to the left side. Inhale and bring the head up to normal position.
  4. This is one round: repeat 2 rounds

Stage – iii: (Right and Left Twisting)

  1. Keep the head upright. While exhaling, gently turn the head to the right so that the chin is in line with the shoulder.
  2. While inhaling, bring the head to the normal position.
  3. Similarly, while exhaling, turn the head to the left. Inhale and bring the head to the normal position.
  4. This is one round: repeat 2 rounds.

Stage – iv: Neck Rotation

  1. Exhale; bend the head forward trying to touch the chin to the chest.
  2. Inhale; slowly rotate the head clockwise in a circular motion, exhale while coming down
  3. Do a full rotation. Then rotate the head in anti-clockwise direction.
  4. Inhale; go back and exhale, come down.
  5. This is one round: repeat 2 rounds.

Note

  1. Move the head as far as possible. Do not over strain.
  2. Keep the shoulders relaxed and steady.
  3. Feel the stretch around the neck and loosening up of the joints and muscles of the neck.
  4. Can be practiced sitting in a chair.
  5. People with neck pain can do the practice gently especially when taking the head back to the extent it is comfortable.
  6. Elderly people and persons with cervical spondylitis, high blood pressure may avoid these practices.


Trunk movement

  1. Keep the legs about 2-3 feet apart.
  2. Rise both the arms up to chest level with palms facing each other and keep them parallel.
  3. While exhaling twist the body towards the left side so that the right palm touches the left shoulder, come back with inhalation.
  4. While exhaling twist the body towards the right side so that the left palm touches the right shoulder, come back with inhalation.
  5. This is one round: repeat two more times. Relax in Samasthiti.

Note:

  1. Do slowly with breathing.
  2. Cardiac patients shall do with care.
  3. Avoid this practice in case of severe back pain, vertebral and disc disorders, after abdominal surgery and during menstruation.


Knee movement

  1. Inhale lift your arms up at the shoulder level, palms facing downwards.
  2. Exhale bend the knees and bring down your body to the squatting position.
  3. In the final position both the arms and thighs should be parallel to the ground.
  4. Inhale, and straighten the body.
  5. Exhale while bringing down the hands.
  6. Repeat two more times.

Note:

  1. Strengthen knees’ and hips’ joint.
  2. Avoid this asana in case of acute conditions of arthritics

3. Yogasanas

a. Standing Postures

1. Tadasana (Palm tree posture)

Tāda means palm tree or mountain. This asana teaches one to attain stability and firmness and forms the base for all the standing asana.

Technique

  1. Stand with feet 2 inches apart.
  2. Interlock the fingers and turn the wrist outwards. Now inhale, raise the arms up and bring them in line with the shoulders.
  3. Raise the heels off the floor and balance on the toes. Stay in this position for 10 -15 seconds.
  4. Exhale bring the heels down.
  5. Release the interlock of the fingers and bring the arms down parallel to the trunk and come back to standing posture.

Benefits

  1. This asana brings stability in the body, helps to clear up congestion of the spinal nerves, corrects faulty posture.
  2. Helps to increase height up to a certain age.

A word of caution

Avoid lifting the toes in case of acute cardiac problems varicose veins and vertigo.


II. Vṛkśāsana (the tree posture)

Vṛkśāsana means tree. The final position of this āsana resembles the shape of a tree, hence the name.

Technique

  1. Stand with feet 2 inches apart.
  2. Focus on a point in front.
  3. Exhale bend the right leg and place the foot on the inside of the left thigh. The heel should be touching the perineum.
  4. Inhale and extend the arms up and join the palms.
  5. Stay in the position for 10 to 30 seconds and breathe normally.
  6. Exhale and bring the arms and right foot down.
  7. Relax and repeat the asana by bending the left leg.

Benefits

  1. Improves neuro-muscular coordination, balance, endurance and alertness.
  2. It tones up the leg muscles and rejuvenates the ligaments also.

A word of caution

Please avoid this practice in case of arthritis, vertigo and obesity.


III. Pāda-Hastāsana (The Hands to Feet Posture)

Pāda means feet, hasta means hands. Therefore, Pāda Hastāsana means taking the palms down towards the feet. This is also referred as Uttānāsana.

Technique

  1. Stand straight with feet 2 inches apart.
  2. Inhale slowly and raise the arms up.
  3. Stretch up the body from the waist.
  4. Exhale and bend forward until the trunk is parallel to the ground.
  5. Exhale, and bend forward until the entire palm rests on the ground.
  6. Maintain this final posture for 10-30 seconds.
  7. Those who are having stiff back should bend according to their capacity.
  8. Now inhale, come up slowly to the vertical position and stretch the arms above the head.
  9. Exhale and slowly return to the starting position in reverse order.
  10. Relax in Tādāsana.

Benefits

Makes the spine flexible, improves digestions, and prevents constipation and menstrual problems.

A word of caution

  1. Please avoid this practice in case of cardiac or back problems, abdominal inflammation, hernia and ulcers, high myopia, vertigo and during pregnancy.
  2. Those with vertebral and disc disorders should also avoid this practice.


IV. Ardha Chakrāsana (The Half Wheel Posture)

Ardha means half. C̣hakra means wheel. In this posture, as the body takes the shape of a half wheel, hence it is called Ardha C̣hakrāsasna.

Technique

  1. Support the back at the waist with all the fingers together pointing forward or downward.
  2. Drop the head backwards and stretching the neck muscles. As you inhale, bend backwards from the lumbar region; exhale and relax.
  3. Stay here for 10-30 seconds with normal breathing.
  4. Inhale and slowly come up.

Benefits

  1. Ardha C̣hakrāsana makes the spine flexible and strengthens the spinal nerves.
  2. Strengthens the neck muscles and improves breathing capacity.
  3. Helps in cervical spondylitis.

A word of caution

  1. Avoid this posture in case of vertigo or a tendency to giddiness.
  2. Hypertensive patients shall bend with care.


V. Trikoṇāsana (The Triangle Posture)

Trikoṇa means triangle. Tri means three and kona is an angle. As the āsana resembles three arms triangles made by the trunk and the limbs, it has been named Trikoṇāsana.

Technique

  1. Stand with your feet comfortably apart.
  2. Slowly raise both the arms sideways till they are horizontal.
  3. Exhale slowly bend to the right side and place the right hand just behind the right foot.
  4. The left arm is straight up, in line with the right arm.
  5. Turn the left palm forward.
  6. Turn your head and gaze at the tip of the left middle finger
  7. Remain in the posture for 10-30 seconds with normal breathing.
  8. As you inhale slowly come up.
  9. Repeat for the left side.

Benefits

  1. Prevents flat foot.
  2. Strengthens calf, thigh and waist muscles.
  3. Makes the spine flexible, improves lungs capacity.

A word of caution

  1. Avoid this posture in case of slipped disc, sciatica, and after undergoing abdominal surgery.
  2. Do not do beyond limits and overdo the lateral stretch.
  3. If one cannot touch the feet, one can reach for the knees instead.


b. Sitting Postures

I. Bhadrāsana (The Firm/ Auspicious Posture)

  1. Bhadhra means firm or auspicious.
  2. Sthiti: Long sitting posture (Viṣrāmāsana)

Technique

  1. Sit erect with the legs stretched out straight in the front.
  2. Keep the hands beside the hips. This is Dandāsana.

Now put the soles of your feet together.

Exhale and clasp your hands together over your toes. Pull your heels as close as

possible up to perineum region.

If your thighs are not touching or are not close to the floor, place a soft cushion underneath the knees for support. This is the final position.

Stay here for some time

Benefits

  1. Keeps the body firm and stabilize the mind.
  2. Keeps the knees and hip joints healthy.
  3. Helps to relieve knee pain.
  4. Acts on the abdominal organs and releases any tension in the abdomen.
  5. Benefits women by relieving abdominal pain often experienced during menstruation.

A word of caution

Avoid this practice in case of severe arthritis and sciatica.


II. Ardha Usṭṛāsana (The Half Camel Posture)

Sthiti: Long sitting posture (Viṣrāmāsana)

Usṭṛa means camel. The final version of this āsana resembles the hump of a camel. In this version, only the first stage (half) of the āsana is being practiced.

Technique

  1. Sit in Viṣrmsana.
  2. Come to Dandāsana.
  3. Fold your legs and sit on your heels.
  4. Keep the thighs close and big toes touching.
  5. Place the hands on the knees.
  6. The head and back should be straight.
  7. This is Vajrāsana.
  8. Stand on your knees.
  9. Place the hands on the waist with fingers pointing downward.
  10. Keep the elbows and shoulders parallel.
  11. Bend the head back and stretch the neck muscles; inhale and bend the trunk backwards as much as possible. As you exhale, relax.
  12. Keep the thighs perpendicular to the ground.
  13. Remain in the posture for 10-30 seconds with normal breathing.
  14. Return with inhalation; sit in Vajrāsana.
  15. Relax

Note

If you can reach the heels, you can place your hands on them and bend backwards. This is called Uṣtrāsana.

Benefits

  1. Relieves constipation and back pain.
  2. Increases blood circulation to the head and cardiac region.

A word of caution

In case of hernia and abdominal injuries, arthritis, vertigo and pregnancy, please avoid doing this āsana.


III. Śaśānkāsana (The Hare Posture)

Śaśaṇka means hare.

Sthiti: Vajrāsana

Technique

  1. Sit in Vajrāsana.
  2. Spread both the knees wide apart, keep the big toes touching.
  3. Keep the palms between the knees.
  4. Exhale and slowly stretch them full length.
  5. Bend forward and place the chin on the ground.
  6. Keep the arms parallel.
  7. Look in front and maintain the posture.
  8. Inhale and come up.
  9. Exhale and come back to Vajrāsan.
  10. Stretch your legs back to Viṣrāmāsan

Benefits

  1. It helps to reduce stress, anger etc
  2. It tones up reproductive organs, relieves constipation, improves digestion and relieves back pain.

A word of caution

  1. Please avoid this posture in case of acute backache.
  2. Patients with osteoarthritis of the knees should exercise with caution or avoid Vajrāsana.


IV. Vakrāsana (The Spinal Twist Posture)

Vakra means twisted. In this āsana, the spine is twisted which has a rejuvenating effect on its functioning.

Sthiti: Dandāsana

Technique

  1. Bend the right leg and place the right foot beside the left knee.
  2. As you exhale, twist the body to the right.
  3. Bring the left arm around the right knee and clasp the right big toe or place the palm beside right foot.
  4. Take the right arm back and keep the palm on the ground with the back straight.
  5. Remain in the posture for 10-30 seconds with normal breathing and relax.
  6. Take out your hands with exhalation and relax
  7. Repeat the same on the other side.

Benefits

  1. Increases flexibility of the spine.
  2. Helps to overcome constipation, dyspepsia.
  3. Stimulates pancreas and helps in the management of diabetes.

A word of caution

Please avoid this posture in case of severe back pain, vertebral and disc disorders, after abdominal surgery and during menstruation.


c. Prone Postures

I. Bhujangāsana (The Cobra Posture)

Bhujanga means snake or cobra. In this āsana, the body is raised like hood of a snake.

Stithi: Prone posture or Makarāsana

Technique

  1. Lie down on your stomach, rest you head on your hands and relax the body.
  2. Now join your legs and stretch your arms.
  3. Keep the forehead on the ground.
  4. Now place your hands just beside the body; keep palms and elbows on the ground.
  5. As you inhale slowly, lift the chin and chest come up to navel region.
  6. Stay there comfortably.
  7. This is called Sarala Bhujangāsana.
  8. Now come back and place your forehead on the ground.
  9. Keep your palms besides the chest where your elbows were and raise the elbows.
  10. Inhale; slowly lift the chin and chest up to navel region.
  11. This is Bhujangāsana.
  12. Exhale, rest your forehead on the ground and place your palms and rest your head on the palms and spread your legs and relax.

Note:

Keep the legs firm so that no load or strain is felt on the lumbar spine.

Benefits

  1. This āsana is best for stress management.
  2. It reduces abdominal fat and alleviates constipation.
  3. It also helps to remove backache and bronchial problems.

A word of caution

  1. Those who have undergone abdominal surgery should avoid this asana for 2-3 months.
  2. Those who suffer from hernia, ulcers should not practice this asana.


II. Śalabhāsana (The Locust Posture)

Śalaba means a locust.

Sthiti: Prone posture; Makarāsana

Technique

  1. Lie down on your stomach in Makarāsana.
  2. Rest the chin on the floor; keep both hands beside the body; palms facing upwards
  3. Inhale raise the legs off the floor as much as you can without bending the knees.
  4. Extend the arms and legs well to ease the lift of the body off the floor.
  5. Stay in this position for 10-20 seconds breathing normally.
  6. Exhale bring the legs down towards the floor.
  7. Rest for a few seconds in Makarāsana.

Note:

Pull up the knee caps and squeeze the buttocks to improve the posture. This āsana is more beneficial when performed after Bhujangāsana

Benefits

  1. Helps in sciatica and lower backache.
  2. Tones the hip muscles and those in the kidney region.
  3. Reduces fat on the thighs and buttocks; good in weight management
  4. Helps the abdominal organs aiding digestion

A word of caution

  1. Cardiac patients should avoid this posture. Please proceed cautiously in case of sever lower back pain.
  2. People with high blood pressure, peptic ulcers and hernia should also avoid this posture.

III. Makarāsana (The Crocodile Posture)

In Sanskrit, Makara means crocodile. In this āsana, the body resembles a crocodile.

Sthiti: Prone relaxation posture

Technique

  1. Lie down on your stomach with the feet wide apart, feet pointing outward.
  2. Bend both the arms and place the right hand on the left hand.
  3. Place the forehead on your hands.
  4. Keep the eyes closed. This is Makarāsana.
  5. This asana is practiced for relaxation in all prone postures.

Benefits

  1. Promotes relaxation of the lower back.
  2. Helps in recovery of back problems.
  3. Indicated for all orthopaedic ailments.
  4. Indicated to counter stress and anxiety.

A word of caution

Avoid this practice in case of low blood pressure, severe cardiac problems and pregnancy.

d. Supine Postures

I. Śetubandhāsana (The Bridge Posture)

Setubandha means formation of bridge. In this posture, the body is positioned like a bridge, hence the name. This is also called as Cạtusp̣ādāsana.

Sthiti: Supine lying; Śavāsana.

Technique

  1. Bend both the legs at the knees and bring the heels near the buttocks.
  2. Hold both the ankles firmly; keep the knees and feet in one straight line.
  3. Inhale slowly, raise your buttocks and trunk up as much as you can to form bridge.
  4. Remain in this position for 10-30 seconds, with normal breathing.
  5. Exhale slowly return to the original position and relax in Śavāsana.

Note

  1. In the final position, the shoulders and head remain in contact with the floor.
  2. If required, in the final position, you can support your body at the waist with your hands.

Benefits

  1. Relieves depression and anxiety. Strengthens lower back muscles.
  2. Stretches abdominal organs, improves digestion and helps to relieve constipation.

A word of caution

People suffering from ulcers and hernia, and women in advanced stages of pregnancy should not practice this asana.

II. Pavanamuktāsana (The Wind Releasing Posture)

Pavan means wind and mukta means to release or to make free. As the name suggests, this asana is useful in removing wind or flatulence from the stomach and intestines.

Sthiti: Śavāsana

Technique

  1. Lie down flat on the back.
  2. Bend both the knees and bring the thighs to the chest.
  3. Interlock the fingers and clasp the shin below knees.
  4. Exhale rise the head till your chin touches the knees and relax. This is Pavanamuktāsana.
  5. Bring the head back to the ground. While exhaling, lower the legs to the floor.
  6. Rest in Śavāsana

Note

Synchronise your breathing with the leg movement.

While touching the knee with the nose/ forehead, you should be able to feel the lumbar region stretch; keep the eyes closed and focus your attention on the lumbar region.

Benefits

  1. Removes constipation; gives relief from flatulence, decreases the bloating sensation in the abdomen and aids digestion.
  2. Offers deep internal pressure, massage and stretching of the highly complicated network of muscles, ligaments and tendons in the pelvis and waist region.
  3. It tones up the back muscles and spinal nerves.

A word of caution

Please avoid this practice in case of abdominal injuries, hernia, sciatica or severe back pain and during pregnancy.

III. Śavāsana (The Dead Body Posture)

Sava means dead body. The final position in this āsana resembles a dead body.

Sthiti: Supine Relaxation Posture

Technique

  1. Lie down on your back with arms and legs comfortably apart.
  2. Palms facing upward; eyes closed.
  3. Relax the whole body consciously.
  4. Become aware of natural breath and allow it to become rhythmic and slow.
  5. Remain in the position till you feel refresh and relax.

Benefits

  1. Helps to relieve all kinds of tensions and gives rest to both body and mind.
  2. Relaxes the whole psycho-physiological system.
  3. The mind, which is constantly attracted to the outer world, takes a U-turn and moves inwards, thus gradually getting absorbed; as the mind turns quiet and absorbed, the practitioner remains undisturbed by the external environment.
  4. It is found very beneficial in the management of stress and its consequences.

4. Prānạ̄yāma

I. NADIŚODHANA or ANULOMA VILOMA PR ṆĀYĀMA (Alternate Nostril Breathing)

The main characteristic feature of this prānạ̄yāma is alternate breathing through the left and right nostrils without or with retention of breath (kumbhaka).

Sthiti: Any meditative posture.

Technique

  1. Sit in any meditative posture.
  2. Keep the spine and head straight with eyes closed.
  3. Relax the body with few deep breaths.
  4. Keep the left palm on the left knee in Jnāna mudra.
  5. The right hand should be in Nāsāgra mudra.
  6. Place the ring and small fingers on the left nostril; fold the middle and index finger. Place the right thumb on the right nostril;
  7. Breathe in from the left nostril; then close the left nostril with the small and ring fingers and release the thumb from the right nostril; exhale through the right nostril.
  8. Next, inhale through the right nostril.
  9. At the end of inhalation, close the right nostril, open the left nostril and exhale through it.
  10. This complete process is one round of the Nādiśodhana or Anuloma Viloma Prānạ̄ yāma
  11. Repeat 5 rounds.

Ratio and timing

  1. For beginners, the duration of inhalation and exhalation should be equal.
  2. Gradually make 1:2; inhalation: exhalation Breathing
  3. Breath should be slow, steady and controlled. It should not be forced or restricted in any way.

Benefits

  1. The main purpose of this prānạ̄yāma is to purify the principle channels of carrying energy called naid’s; hence nourishes the whole body.
  2. Induces tranquillity and helps to improve concentration
  3. Increases vitality and lowers the level of stress and anxiety
  4. It elevates cough disorders.

II. Bhrāmarī Prānāyāma (BHRĀMARĪ RECAKA)

Bhrāmarī is derived from bhramara which means a black bee. During the practice of this prānāyāma, the sound produced resembles the buzzing of a black bee.

Sthiti: Any meditative posture.

Techniques: 

Type – I

  1. Sit in any meditative posture with eyes closed.
  2. Inhale deeply through the nose.
  3. Exhale slowly in a controlled manner while making a deep, steady humming sound such as that of black bee. This is one round of Bhrāmarī.
  4. Repeat 5 rounds.

Type – II

  1. Sit in any meditative posture with eyes closed.
  2. Inhale deeply through the nose.
  3. Close the eyes with index fingers, mouth with ring and small fingers and ears from respective thumbs as shown in the figure. This is also called Śanmukhi Mudra.
  4. Exhale slowly in a controlled manner while making a deep, steady humming sound such as that of black bee. This is one round of Bhrāmarī.
  5. Repeat 5 rounds.

Benefits

  1. The practice of Bhrāmarī relives stress and helps in alleviating anxiety, anger and hyperactivity.
  2. The resonance effect of humming sound creates a soothing effect on the mind and nervous system.
  3. It is a great tranquiliser; found good in the management of stress related disorders.
  4. It is a useful preparatory prānāyāma for concentration and meditation.

A word of caution

Please avoid this practice in case of nose and ear infections.

III. Kapālabhāti

Sthiti: Any meditative posture eg Suḳāsana/Padmāsana/

Vajrāsana

Technique

  1. Sit in any meditative posture.
  2. Close the eyes and relax the whole body.
  3. Inhale deeply through both nostrils, expand the chest.
  4. Expel the breath with forceful contractions of the abdominal muscles and relax.
  5. Do not strain.
  6. Continue active/forceful exhalation and passive inhalation.
  7. Complete 30 rapid breaths, then take a deep breath and exhale slowly.
  8. This is one round of Kapālabhati.
  9. Each round shall be followed by deep breathing.
  10. Repeat 2 more rounds.

Breathing: Forceful exhalation by contracting the abdominal muscles, without any undue  movements in the chest and shoulder region. Inhalation should be passive throughout the

practice.

Number of rounds: Beginners can practice up to 3 rounds of 20 breaths each. The count and rounds can be increased gradually over a period of time.

Benefits

  1. Kapālabhāti purifies the frontal air sinuses; helps to overcome cough disorders.
  2. It is useful in treating cold, rhinitis, sinusitis, asthma and bronchial infections.
  3. It rejuvenates whole body, and keeps the face young and vibrant.
  4. It balances and strengthens the nervous system and tones up the digestive system.

A word of caution

Please avoid this practice in case of cardiac conditions and giddiness, high blood pressure, vertigo, chronic bleeding in the nose, epilepsy, migraine, stroke, hernia and gastric ulcers.

Note:- The contents for YOGA section has been extracted from Ministry of Ayurveda, Yoga & Naturopathy, Unani, Siddha and Homoeopathy (AYUSH), Government of India


2-5.png
15/Apr/2020

Exercising regularly is one of the best things you can do for healthy living.

Its greatest benefits include helping fight obesity, achieve and maintain a healthy body weight, maintain muscle mass, reduce risk of chronic disease, reduce stress, relieve symptoms of depression and anxiety, gives more energy, increase bone density, strengthen the heart and lungs, improve quality of life and confidence.

We all know exercise is good; however it can be hard to put the knowledge into practice. There are so many different suggestions on the types of activities and the ideal frequency, it can lead to information overload. The most important thing is some exercise—any type of exercise—is better than no exercise


A few guidelines on exercise:

It is more important to exercise consistently than to worry about how to exercise.

Choose an exercise program in which you can remain consistent. Stay with the exercise program that you enjoy as much as possible

Schedule work outs instead of trying to work an exercise program into your existing schedule.

Don’t overdo if you have not been exercising for quite some duration of time. It is important that you don’t hurt yourself. Start slowly and gradually increase the length and intensity of your workout.

If you have any existing health issues or joints or musculoskeletal problems or over the age of 40 years, take guidance from a specialized person to choose your exercise program.

Building your muscle mass through strength training can be beneficial during a weight loss program as it will help your body retain the muscle mass and lose only the fat mass.

There are several Yoga asanas and Pranayama that can prove beneficial in improving our body’s flexibility, increasing the strength of muscles, tissues and ligaments and even in managing many lifestyle issues.


Types of Exercise


Cardio

Cardio exercise is any rhythmic activity performed continuously and can include activities like walking, running, aerobics, cycling, swimming, and dancing. Cardio strengthens the heart and lungs, increases endurance and burns calories.

Strength Training

Strength training works in a different way than cardio and is equally important for good health and weight loss. With strength training, you lift weights (dumbbells, barbells, kettlebells, resistance bands, machines, etc.) to strengthen the muscles, bones, and connective tissue. Strength training builds lean muscle tissue, which raises metabolism helping you to reduce body fat provided the calorie intake is kept in line. If you are new to resistance exercise and intimidated by using weights, bodyweight exercises like squats, pushups and planks are a great way to start.

Flexibility

While stretching is often the most overlooked exercise, it’s important for keeping us agile as we get older. And, unlike the rigors of cardio and strength training, it’s relaxing and it feels good.

Stretching can be done anytime throughout the day, it’s also important to stretch after your workouts, especially if you have any chronically tight areas.

The guidelines for stretching are

  1. Stretch your muscles when they’re warm (after your warm-up or, even better, after your workout).
  2. Do static stretches with a focus on tight areas, such as the hamstrings and lower back.
  3. Stretch a minimum of two to three days a week. Even better would be every day.
  4. Stretch within your range of motion. Stretching shouldn’t hurt.
  5. Hold each stretch for about 15 to 30 seconds and do two to four reps of each stretch.
  6. Yoga workouts are a great way to both stretch your body at the same time you build endurance and promote relaxation and stress-reduction

Warm up with stretches—active movements that warm and flex the muscles you’ll be using, such as leg kicks, walking lunges, or arm swings

Cool down after your workout– it’s important to take a few minutes to cool down and allow your heart rate to return to its resting rate. A light jog or walk after a run, or some gentle stretches after strength exercises can also help prevent soreness and injuries.

Drink plenty of water– Your body performs best when it’s properly hydrated. Failing to drink enough water when you are exerting yourself over a prolonged period, especially in hot conditions, can be dangerous.

Listen to your body. If you feel pain or discomfort while working out, stop! If you feel better after a brief rest, you can slowly and gently resume your workout. But don’t try to power through pain. That’s a sure shot recipe for injury.

Rest and Recovery

While we often focus on getting in as much exercise as possible, rest and recovery are also essential for reaching your weight loss and fitness goals. While you can often do cardio every day (though you may want to rest after very intense workouts), you should have at least a day of rest between strength training workouts.

Make sure you don’t work the same muscles two days in a row to give your body the time it needs to rest and recover.

Finding Motivation

While it’s important to know basic exercise guidelines and principles, the most important step in starting an exercise routine is exploring the idea of motivation. Without that, all the advice in the world won’t do you any good.

It’s important to remember that motivation doesn’t just happen. It is something you make happen each and every day. If you have multiple reasons to exercise, you’ll always have something to get you moving, even when motivation is hard to come by. The hardest part of exercise is getting started. If you can get that far, you’ve won half the battle.


2-3.png
15/Apr/2020

Aerobic” means “in the presence of, or with, oxygen.” while “Anaerobic“, on the other hand, means “the absence of, or without, oxygen.”

Aerobic exercise is any type of cardiovascular conditioning. It can include activities like brisk walking, swimming, running, or cycling. You probably know it as “cardio.”

Anaerobic exercise is performed at an intensity that causes you to get out of breath quickly and can be sustained for only a few moments. Weight lifting and sprinting are examples of anaerobic exercise.

  • Your breathing and heart rate will increase during aerobic activities. You know you’re doing aerobic exercise when your heart’s thumping and you’re breathing faster than you do at rest but you can sustain the activity for extended periods of time. The recommend cue is “warm and slightly out of breath” to determine if your activity level is aerobic. Aerobic exercise helps keep your heart, lungs, and circulatory system healthy.  Aerobic exercise is the type of moderate-intensity physical activity that you can sustain for more than just a few minutes with the objective of improving your cardio-respiratory fitness and your health.
  • Aerobic exercise can help maintain a higher heart rate while the oxygen is used to burn the fats. At the beginning of an aerobic exercises session, glycogen is broken down to produce glucose. If there is not enough glucose available, it would result in fat beginning to decompose. When our body starts to use fat as a fuel, it causes a condition which is usually described as “hitting the wall”
  • It strengthens your heart and lungs, trains your cardiovascular system to manage and deliver oxygen more quickly and efficiently throughout your body. Aerobic exercise uses your large muscle groups, is rhythmic in nature, and can be maintained continuously for extended period of time.
  • Regular aerobic exercise will bring remarkable changes to body, metabolism, heart, and spirits. It has a unique capacity to exhilarate and relax, to provide stimulation and calm, to counter depression and dissipate stress.
  • Exercise reduces levels of the body’s stress hormones, such as adrenaline and cortisol. It also stimulates the production of endorphins, chemicals in the brain that are the body’s natural painkillers and mood elevators. Endorphins are responsible for the “runner’s high” and for the feelings of relaxation and optimism that accompany many hard workouts — or, at least, the hot shower after your exercise is over.

Behavioral factors also contribute to the emotional benefits of exercise. As your waistline shrinks and your strength and stamina increase, your self-image will improve. You’ll earn a sense of mastery and control, of pride and self-confidence. Your renewed vigour and energy will help you succeed in many tasks, and the discipline of regular exercise will help you achieve other important lifestyle goals.

  • Aerobic exercise is usually performed to music and may be practiced in a group setting led by an instructor (fitness professional), although it can also be done solo and without musical accompaniment. With the goal of preventing illness and promoting physical fitness, people perform various routines comprising a number of different dance-like exercises.
  • A higher percentage of fat is burned during aerobic exercise than during anaerobic exercise. Here’s why. Fat is denser than carbohydrate (fat has nine calories per gram and carbohydrate has four), and so it takes more oxygen to burn it. During aerobic exercise, more oxygen is delivered to the muscles than during anaerobic exercise, and so it follows that a higher percentage of fat is burned during aerobic exercise when more oxygen is available. When less oxygen is present, like during anaerobic exercise, a higher percentage of carbohydrate is burned.


Benefits of Aerobic Exercise

In addition to strengthening your heart and cardiovascular system, participation in regular aerobic exercise has many health benefits. Aerobic exercise:

    • Improves circulation and helps body use oxygen better
    • Increases energy
    • Increases endurance, which means you can work out longer without getting tired
    • Helps reduce the risk of developing heart disease
    • Helps reduce the risk of developing diabetes
    • Helps reduce body fat
    • Helps you reach and maintain a healthy weight
    • Helps reduce stress, tension, anxiety, and depression
    • Improves sleep
Lose weight with Aerobics exercise
  • Losing weight is not very easy for most people. Most people don’t really know how to lose weight healthily. This is one reason why obesity has increased tremendously in most parts of the world. Losing weight not only takes time but also discipline. However, that is what most people don’t have. They don’t have the patience which is required to lose weight.
  • To lose weight effectively with aerobics, the workout should raise your heartbeat for an extended period of time. You should continue the aerobics workout for at least twenty minutes at a time. This is because this is the point where your body starts to use excess fat for energy.
  • However, aerobics workouts don’t have to be boring and don’t have to be the same thing day after day. The best way to continue your aerobics workout is to find several workouts that you can combine throughout the week or month. That way, your workout never becomes dull and you won’t get easily burned out.

Another factor that you must remember is to never lose your motivation. Most often, the reason people fail to lose weight is because their motivation wanes after a few days or weeks. Healthily losing weight takes time. It can be weeks or even months before you reach the weight you desire Most people don’t realize is that it takes twice as long to lose the weight as it does to gain it. So, the most important thing to remember is to never lose your motivation and continue with your aerobics workouts to lose weight.


Few Aerobic workouts

Cardio kickboxing


Cardio kickboxing is a mix of martial arts, boxing, and aerobics. Your may start with a warm up of jogging, jumping jacks, or strengthening exercises, such as push ups. Then expect a series of punches, kicks, and hand strikes for the main workout.

Benefits: Kickboxing is a high-impact exercise that builds strength and endurance. It may also reduce stress and improve your reflexes.

Safety: Drink plenty of water throughout the class. Take a break if you feel dizzy.

Duration and frequency: 60 minutes, 1 to 3 times per week

Always finish your workout with a cool down and stretch. Drink plenty of water throughout.


Zumba

If you like to dance, Zumba is a fun choice for an aerobic workout. Basically Zumba is easy-to-follow dance moves set to upbeat music.  Finish your workout with a cool down and stretch.


Benefits: Zumba is beneficial for heart health, improves coordination, tones your entire body, and helps relieve stress.

Safety: Drink lots of water during the class. Take a break if you feel tired or dizzy. Wear shoes that provide good ankle support if you’re prone to ankle injuries.

Duration and frequency: 60 minutes, 1 to 3 times per week


Running or jogging

If you’re a beginner, run for 20 to 30 minutes twice a week. Your pace should be conversational during the run. You can alternate between 5 minutes of running and 1 minute of walking to start. To stay injury-free, always stretch after your run.


Benefits: Running is one of the most effective forms of aerobic exercise. It can improve heart health, burn fat and calories, and lift your mood, just to name a few.

Duration and frequency: 20 to 30 minutes, 2 to 3 times per week


Walking


If walking is your main form of exercise, aim to get 150 minutes per week. This can be broken down into 30 minutes of walking 5 days a week. Or, walk briskly for 10 minutes at a time, 3 times each day.

You can also use a fitness tracker to keep tabs on how many steps you take each day. If your goal is to walk 10,000 steps a day, start with your base (current amount you walk) and slowly up your daily step count. You can do this by increasing your daily steps by an extra 500 to 1,000 steps a day every 1 to 2 weeks.

So, once you’ve identified your base, add an extra 500 to 1,000 steps. Then, 1 to 2 weeks later, increase your daily step count by an additional 500 to 1,000 steps.


Benefits: Walking daily can reduce your risk of heart disease, obesity, diabetes, high blood pressure, and depression.

Duration and frequency: 150 minutes per week, or 30 minutes 5 days a week


Swimming


Swimming can be one of the aerobic exercises. You’re also increasing your heart rate, toning your muscles, and building strength and endurance — all without adding additional strain to your body.

You can start by swimming laps using one stroke, such as freestyle. As you swim more, add additional strokes. For example, you could do 1 to 4 laps of freestyle followed by 1 to 4 laps of breaststroke or backstroke.

If you get tired, rest on the side of the pool between laps. Always follow the safety instructions and guidelines of the pool where you swim.


Benefits: Swimming is a low-impact exercise, so it’s good for people prone to or recovering from an injury or living with limited mobility. It can help you tone your muscles and build strength and endurance.

Safety: Avoid swimming alone and, if possible, choose a pool with a lifeguard on duty. If you’re new to swimming, begin by enrolling in swim lessons.

Duration and frequency: 10 to 30 minutes, 2 to 5 times a week. Add 5 minutes to your swim time each week to increase your duration.


Dance Aerobics


The low-impact aerobic dance classes are effective for you if you are overweight, older and pregnant. If you are fit, they are a good alternative when you are recovering from an injury.

However, in spite of its popularity, many people still give excuses to not take up any form of exercise. People often claim that they do not have enough time to go to the gym or that gym membership is much too expensive. No matter what excuse is given, aerobics can actually be done in the comfort of the home. 

Exercise is play and recreation; when your body is busy; your mind will be distracted from the worries of daily life and will be free to think creatively.


r3-4.png
15/Apr/2020

Pranayama

Pranayama is the formal practice of controlling the breath, which is the source of our prana, or vital life force. Pranayama is the conscious awareness of breath: the life force that both energizes and relaxes the body. Prana means life force or breath sustaining the body; Ayama translates as “to extend or draw out.” Together both mean breath extension or control.

Pranayama is the art and science of yogic breathing techniques, and these techniques will reliably produce the benefits such as physical well-being, lightness of heart, clarity of mind, the ability to quickly increase our energy, release stress, inner and outer health and fulfillment, purpose, intention, and direction


Benefits of Pranayama

The key to healthy and happy living may lie in right breathing. When we attend to our breath, it brings us to the present moment, increases our self-awareness, and brings a sense of calm.

Pranayama goes a step further than simple awareness of the breath, using specific rhythms and techniques to bring us numerous benefits on the mental, emotional and physical levels.

  • Calms the mind, reducing worries and anxieties
  • Can aid with healthy eating habits and weight loss
  • Acts as a stress reliever
  • Improves focus and attention
  • Boosts the immune system
  • Rejuvenates the body and mind
  • Helps in detoxification
  • Improves concentration
  • Helps to treat sleep disorder
  • Good for skin health
  • Helps improve digestive system function
  • Strengthens the respiratory system
  • Good for nasal passages & sinuses
  • Improves cardiovascular health
  • Increases energy, bringing enthusiasm and positivity
  • May even slow down the aging process

Spiritual benefits of pranayama

One can hardly make any spiritual progress without the practice of Pranayama, whether it’s the slow breathing or fast breathing. It calms your mind by muting the unnecessary chatter going at the back of your head. As pranayama increases the olfactory senses, the fragrance and smell in the environment also becomes a relieving factor and helps our mind and soul to rejuvenate. All the physical and psychological benefits of yoga and pranayama eventually brighten the spiritual aspect of your life.

Yoga is the union of self to the higher self, i.e. the body and soul grow together for connecting you to the ultimate divinity of the Universe. Pranayama being an integral part of Yogic practice helps to manifest the same. It enhances your clairvoyance and sixth sense. Your wisdom achieves its highest state and you start exhibiting the highest potential in decision making and actions. It also helps the resolve to acquire divine virtues like love, patience, forgiveness, devotion to duty and unselfishness.

Hence, pranayama is not only an exercise to regulate your Prana but also channelizes the positive effects it has on your overall body, mind and behaviour.


Things to keep in mind before practicing Pranayama

Though most forms of yoga are safe to practice across the board, it is advised that people who want to practice different Pranayama’s should at least have some prior experience doing yoga. And it is best if Pranayama is practiced under the supervision of a guru.


Certain breathing exercises are not advised for the following people:

  • Those who suffer from hypertension or low blood pressure
  • Those recovering from a recent heart attack
  • Those with chronic heart conditions
  • Pregnant women
  • Women who are menstruating
  • Those with bronchitis or severe breathing issues
  • Practice Pranayama on an empty stomach
  • Do it at your own pace. If you feel dizzy, increase the duration of the breaks.

Types of Pranayama and Their Benefits


1 – Bhastrika Pranayama

Bhastrika means bellows in Sanskrit. This breathing exercise resembles the blowing of bellows. Bhastrika is the excellent breathing exercise which we can practice slowly or fast as per our convenience. In this pranayama, the body gets the maximum amount of oxygen due to complete inhaling and exhaling breathing. Bhastrika involves a rapid and forceful process of inhalation and exhalation powered by the movement of the diaphragm. The movement of air is accompanied by an audible sound. One inhale and exhale equals one round of bhastrika, and it may be repeated for many consecutive rounds.

Bhastrika Pranayama Technique

There are many breathing techniques in yogic tradition which rejuvenates dormant cell of the body by energetic contraction and expansion of respiratory organs. Bhastrika is one of those energetic breathings which involve heavy breathing through nostrils.

In Bhastrika pranayama one requires control over the diaphragm. During this practice, it is very common that one may start feeling dizzy and feel hyperventilated. Therefore to do this pranayama effectively one has to gradually develop control over inhalation and needs to regulate it consciously to avoid dizziness. This entire practice should be performed in a relaxed state of body and mind.

Practice of Bhastrika pranayama fans the digestive fire and massages all the internal organs of the body. During the process, there is an intense activity of the diaphragm and the lungs which result in a better-oxygenated supply of the blood to all the different areas of the body and brain especially.

How to practice Bhastrika Pranayama?
  • Sit comfortably in Siddhasana or Padmasana with spine erect and aligned with neck. Place your hands in Dhyan mudra to concentrate on your mind.
  • Take a few deep breaths in and out followed by consecutive expanding and contracting of abdominal muscles and lungs with your Prana movement.
  • Begin bellows breathing by increasing the pace of deep breathing.
  • To do this, inhale forcefully and quickly through nostrils by rapid expanding of the chest and abdominal muscles. It will fill your lungs with a sufficient amount of oxygen.
  • After rapid inhale, exhale in the same manner by contracting your abdominal muscles and thus forcefully expelling toxins out from the body through the nose.
  • One rapid inhale followed by rapid exhale counts as one breathe of bhastrika.
  • Do ten such breaths to complete 1 round of Bhastrika Pranayama
Practice Tips
  • Practice 3 rounds with pause in-between rounds. Start your pranayama practices with the Bhastrika pranayama followed by the Kapalbhati Yogic breathing. Do it at your own pace. If you feel dizzy, increase the duration of the breaks.
  • Never practice Bhastrika on a full stomach or at night.
  • People suffering from Heart problems, Hypertension high BP, fever, vertigo, pregnancy, intestinal disorders, migraine, and spinal abnormalities should refrain from practicing this pranayama technique.
  • Try to increase the count as the stamina increases.
  • Start the pranayama process with bhastrika pranayama after that go for other pranayama.
Benefits of Bhastrika Pranayama
  • Supports parasympathetic nervous system and benefits the motor system.
  • Helps in allergies, asthma, sinus, bronchitis, other respiratory issues, tonsil, and thyroid.
  • Favourable effect on the digestive system.
  • Natural energizer that vitalizes the body and mind.
  • Harmonizes the three doshas of the body: Vata, Pitta, and Kapha.
  • Oxygenates the blood increasing the vitality of all the organs, tissues and helps to remove toxins and impurities
  • Drains excess phlegm from the lungs.
  • Improves our immune system.
  • Best for those who are facing the problem of low blood pressure.
  • Checks Sleep Apnea. This Pranayama is medicine to check and treat this problem holistically.
  • Our heart and head get adequate quantity of fresh and pure air by which our health is improved.
  • Treats Fibrosis – effective in treating the condition in an efficient manner.
  • Good for Depression, it is a safe method of dealing with anxiety issues for yielding positive results.


2 – Kapalbhati Pranayama

Kapalbhati is a yogic technique in which belly intentionally draws in to produce forced & sharp (active) exhalations through nostrils followed by automatic passive inhalations. In Kapalbhati, it becomes a practice to consciously watch your breath and movements of inner organs while Prana drawing in and out of the body. Traditionally, the practice of Kapalbhati is preferred in some seated yogic asana while maintaining a balance of ease and effort. After getting comfortable into the pose, begin Kapalbhati breathing; draw your belly in to force your breath out in shorter intervals of inhaling.

Kapalbhati Pranayama Technique

The technique of Kapalbhati pranayama is performed by reversing the normal breathing cycle. By making inhalation passive and exhalation active. It initiates action by activating the vertical movements of the diaphragm in the body. During the practice, exhalation is forced out of the body by contraction of abdominal muscles and upward movement of the diaphragm followed by subsequent passive inhalation and relaxation of abdominal muscles. Normally Kapalbhati pranayama is performed at the rhythm of each contraction per second. But later on with practice, rhythm of the breath can also be increased.

How to practice Kapalbhati Pranayama?
  1. Sit on a hard surface with your spine erect to start with the process of Kapalbhati pranayama.
  2. You can either sit in a sukhasana (your legs crossed), Virasana (your legs bend and your shins tucked in under your thighs or on a chair while performing this pranayama.
  3. Place your hands on your knees with the palms facing up or you can place your hands one over the other in your lap for higher focus.
  4. Inhale air with both the nostrils.
  5. Exhale the air with a little forceful action and again breathe in.
  6. You can put your hand on your lower abdomen to feel the air gushing out of the body.
Practice Tips
  • It should be one stroke per sec, in condition of any health issue go slow. You should practice Kapalbhati pranayama 10-15 minutes for maximum benefits
  • Morning is the best time to practice Kapalbhati pranayama; you can practice in evening also. Open area is an ideal place for breathing exercises
  • If you have acid or heat-related gastric problems, such as ulcers you should use caution with Kapalbhati Pranayama.
  • Avoid Kapalbhati in case of high blood pressure, heart disease, stroke or epilepsy.
Benefits of Kapalbhati Pranayama
  • Its prime physical benefits are weight loss as it works up the respiratory system as well as the abdominal muscles. The breathing technique increases metabolism which supports weight loss.
  • Kapalbhati is a traditional practice for internal cleansing. It cleans all the toxins which are present in any form.
  • Improves the function of the digestive tract as well as absorption and assimilation of nutrients which is vital for better health.
  • Improves the function of kidneys and liver.
  • Kapalbhati triggers your abdominal region, helps in controlling blood sugar level and hence beneficial for diabetic patients.
  • Calms your mind and rejuvenates your digestion system
  • Improves the blood circulation problem in whole body
  • Drastically reduces the risk of developing hernia.
  • Helps in controlling obesity, reduces belly fats and getting rid of other excess fats.
  • Adds lustre as well as beauty to the face and makes it more radiant
  • The breathing technique helps reduce stress in the eyes, thus curing dark circles around the eyes.
  • Clears the mind and helps in controlling the thoughts which essentially lead to increased concentration, focus and peace of mind.
  • Helps in allergies, asthma, sinus, bronchitis and other respiratory-related problems.
  • Daily practice of Kapalbhati can cure all general intestinal problems.

3 – Ujjayi Pranayama

In this breathing exercise, the process of inhalation and exhalation are both done through the nostrils. During the process of inhalation the “ocean-like sound” is formed by moving the glottis as air passes in and out.

The sound is produced because of the friction of air within the throat; a typical sound like the ocean is made. (The sound is completely different from the sound emitted from the larynx) hence, the Pranayama is termed as Ujjayi Pranayama. By this, it is also called as “Sound Breath” or “Ocean sound breath”.

How to practice Ujjayi Pranayama?
  1. Be seated in a comfortable position. Relax and be comfortable.
  2. Gently close your eyes and relax your mouth and jawline.
  3. Practice deep sessions on inhalations and exhalations. Feel the air passing through your wind pipe as you practice the process.
  4. During exhalation try to softly utter the sound “ahh” from your mouth.
  5. Once you become comfortable with the exhalations, maintain a contraction at the back of your throat on inhalation.
  6. Once you get comfortable with this practice, use only the nose for breathing, keeping your mouth shut.
  7. Concentrate on the sound of your breath, which should be audible by now. The inhalations should be able to fill your lungs to the fullest.
  8. You can start this pranayama for 5 minutes in the beginning and increase the time period up to 15 minutes once you become familiar with the set up.
Practice Tips
  • People who are suffering from any heart disease and high blood pressure shouldn’t combine Bandha and breathe retention in this pranayama.
  • Don’t tighten your throat during this pranayama.
  • If you are a beginner then keep the duration of this Pranayam short.
  • If you are a patient of hypertension refrain from practicing this pranayama
  • If you feel a little warmth in the back of your throat, do not worry. It is normal.
  • If you feel dizzy, discontinue the process and start breathing normally.
  • Make sure under any circumstances the proportion of the breathing is not forced.
  • Practice it early in the morning before sunrise or after 5-6 hour of your meal.
  • Practice it after Kapalbhati Pranayama and before Bahya or Anulom Vilom Pranayama.
Benefits of Ujjayi Pranayama
  • Very helpful in Asthma problem and other respiratory diseases.
  • Increases the concentration power.
  • Beneficial to those who have stammering and lisp problem.
  • Very helpful in clearing blocked arteries and regulates cholesterol
  • It lowers the risk of heart attacks.
  • This pranayama is very suitable for those who have cough, sinus, and allergy problems.
  • Beneficial in indigestion, liver problems, dysentery, fever, cataracts, Rheumatism and migraine also.
  • Ujjayi Pranayama can cure your thyroid problem.
  • It boosts the focusing power of the mind
  • The body becomes healthy and strong
  • It generates the internal heat
  • Gives a positive attitude
  • Practicing this pranayama on a daily basis helps to increase the blood circulation throughout the body and stimulates the overall body metabolism.
  • By practicing this pranayama regularly, you can  bring positive changes to your physical, mental, emotional, and spiritual well-being.
  • Ujjayi Pranayama helps the body to get rid of toxins that have accumulated over a period of time.
  • Practicing Ujjayi Pranayama helps to release tension. Additionally it also helps to diminish headaches and provide relief from sinus.
  • Beneficial in snoring problem.
  • Helps treat the sudden stopping of breath while sleeping at night (Sleep Apnea).
  • It is also beneficial for throat mucus.

4 – Bahya Pranayama

“Bahya” means “external/outer” and “Pranayama” means “expansion of life energy” i.e. Bahya Pranayama meaning external Breath or External retention.

In Bahya Pranayama, our inner powers are awakened from the cortex to the Sahasrara Chakra. The Bahya Pranayama is practiced after Kapalbhati Pranayama and before Anulom Vilom Pranayama. The Bahya Pranayama is generally the combination of 3 Bandha i.e. Jalandhar Bandha, Uddiyana Bandha, and Mula Bandha. With this Pranayama, the power of Kundalini can be awakened. By doing Kapalbhati Pranayama, the energy of Muladhara, Swadisthan and Manipur Chakra is awakened. Bahya Pranayama takes this awakened power to the next level.

How to practice Bahya Pranayama?
  1. Sit in any comfortable posture like Padmasana, Siddhasan, and Sukhasana.
  2. Take a deep breath and exhale completely.
  3. After exhaling hold the breath out.
  4. After holding the breath out you have to apply 3 bandha now –
    1. Jalandhar Bandha (Chin Lock) – Touch the upper part of the chest by your chin.
    2. Uddiyana Bandha (Abdominal Lock) – Shrinking the stomach inward.
    3. Moola Bandha (Root Lock) – Pull the navel and abdominal area in the upward direction.
  1. Hold this position for 5 to 10 seconds.
  2. Assume that all your negativity is being expelled from your body.
  3. Slowly breathe in along with releasing all the three banda in sequence i.e. first release Mula Bandha and Uddiyana and at last Jalandhara.
  4. Then relax and get back to the starting position.
  5. This whole process takes 10-20 seconds time
  6. Repeat this process 5-10 times.
  7. You can hold your breath outside 10-30 seconds according to your stamina.
  8. In case you are suffering from neck and back pain, do not move your head down. Just look straight.
Practice Tips
  • All Pranayama should be done on empty stomach
  • Women should not practice this pranayama during the periods.
  • Avoid this pranayama if you are pregnant or if you are planning to get pregnant.
  • Patients with cardiovascular, hypertension and high blood pressure do not practice this pranayama
Benefits of Bahya Pranayama
  • Helpful in all abdominal complaints (like constipation, acidity, gastric problem, hernia) and cures it completely.
  • Bahya Pranayama helps to increase your concentration.
  • Regular practice of this pranayama helps immensely to control diabetes.
  • Digestion power can be strengthened with constant practice.
  • It cures the reproductive issues.
  • It is effective to cure hernia.
  • Urinary tract infections (UTI) and prostate problems can be eliminated with regular practice.
  • Improves the concentration of the mind.


5 – Anulom Vilom Pranayama

This is not just a breathing exercise, but it is a noteworthy yogic technique that involves controlling of subtle ‘Pranic energies’ (or vital force or bio-energies) of our body flowing through specific channels. The controlling of the Prana through regular practice of Anulom Vilom pranayama helps to balance the energies flowing through the Ida and Pingala nadis. This, in turn, stimulates the central channel called Sushumna Nadi. This helps in elimination of free radicals and toxins from the Ida and Pingala nadi and helps to restore a balance between the two hemispheres of the brain. This helps to purify the entire nervous system. Healing and bringing about mental calm, peace, and tranquillity.

How to practice Anulom Vilom Pranayama?
  1. Sit in any meditative posture either Sukhasana, Padmasana etc.
  2. Spine should be upright.
  3. Using the right thumb, block the right nostril. Inhale through the left nostril for 2 seconds. Now block both nostrils and hold the breath for 4 seconds. (Cardiac, Blood pressure patients and pregnant women should not hold their breath while doing this pranayama just keep inhaling and exhaling.)
  4. Keep the left nostril blocked and release the right nostril. Exhale through the right nostril for 2 seconds. Now inhale through the right nostril for 2 seconds. Block both the nostrils and hold the breath for 4 seconds. Keep the right nostril blocked and release the left nostril. Exhale for 2 seconds from the left nostril. Block both the nostrils. Hold the breath in suspension for 2 seconds. This completes one single round.
  5. Start the cycle again this time inhaling from the right nostril. Repeat for a maximum of 10 rounds. Try to increase the counts of inhalation and exhalation with regular practice. Try to maintain the ratio of equal counts for inhalation, exhalation, and suspension of the breath while holding the breath for double the duration.

Note: – Anulom Vilom is also called as Naadi shudhi; however in Naadi shudhi you hold the breath for more than 10 seconds

Practice Tips

  • Practice it with the empty stomach or after 4-5 hours of the meal.
  • If you are very weak or suffering from anaemia, then you should do this pranayama in a very slow manner. Only for 2 minutes.
  • Those suffering from heart ailments, high blood pressure should not attempt retention of breath.
  • While doing the Anulom Vilom Pranayama, you must imagine that all the impurities within your body are coming out through exhaling. You will feel that your body and mind is getting filled up with positive energy.
  • While performing Anulom Vilom Pranayama, you must sit on the ground or a yoga mat while facing north or east. Make sure that your chest, neck and head are in perfect straight line. Keep your spinal cord stretched during the pranayama.
Benefits of Anulom Vilom Pranayama 
  • Practicing Anulom Vilom Pranayama on a regular basis can help in improving brain activity.
  • Best breathing technique for boosting your memory.
  • Helps in getting rid of anger, depression, tension, forgetfulness, worry, uneasiness, anxiety, migraine, stress, sleep deprivation and high blood pressure. This pranayama can transform negative feelings and thoughts into positive.
  • It can treat various conditions like gastric issues, constipation, asthma, allergic problems, snoring and gastric problems.
  • Regular practice of Anulom Vilom helps cure diabetes and blood pressure
  • The three doshas, namely, Vata, Pitta and Kapha are regulated effectively
  • This pranayama can help in curing fever, arthritis, sinusitis, flatulence, acidity and varicose veins.
  • Anulom Vilom Pranayama can cure diseases and problems of the muscular system.
  • It can help in improving blood circulation in a major way.
  • It can resolve eye issues and ear problems.
  • It can balance, relax and energize the nervous system.
  • Anulom Vilom Pranayama can help to clear the blockages in arteries and resolve chronic sinus.
  • Anulom Vilom Pranayama can help to get rid of headaches.
  • It can help in resolving obesity and managing metabolism.
  • It can enhance the stamina and strength of the lungs.
  • The breathing exercise can remove harmful toxins from your body
  • Improves your immune system, so it cures general issues like cough & cold.
  • Anulom Vilom is the most suitable Pranayama for all.
  • Alternate nostril breathing is an ideal breathing technique for maintaining your heart healthy.


6 – Bhramari Pranayama (Bee breath)

The bhramari pranayama is a slow breathing technique and can be practiced irrespective of the age and gender. The Bhramari pranayama breathing technique derives its name from the black Indian bee called Bhramari. This pranayama is said to activate one of the energy focal centre called “Vishuddhi chakra” located in the throat region, which is responsible for activating the voice box used for speech communication. Bhramari pranayama is effective in instantly calming down the mind. It is one of the best breathing exercises to free the mind of agitation, frustration or anxiety and get rid of anger to a great extent. A simple technique, it can be practiced anywhere – at work or home and is an instant option to de-stress yourself.

How to practice Bhramari Pranayama?
  1. Sit on the padmasana or any other sitting Asana. Keep a gentle smile on your face.
  2. Keep your eyes closed for some time and breathe deeply
  3. Now close your ears lids or flaps with your thumbs.
  4. Place your index finger just above your eyebrows and the rest of your fingers over your eyes with your middle fingers
  5. Applying very gentle pressure to the sides of your nose.
  6. Now concentrate your mind on the area between your eyebrows.
  7. Keep your mouth closed; breathe out slowly through your nose with making a humming sound of Om.
  8. Repeat this process 5 times. Important thing is that while doing this pranayama, assume that you are being connected to all the positive energies of the universe.
Practice Tips
  • Do Bhramari Pranayama after completing the Anulom Vilom Pranayama.
  • Don’t press your ear cartilage too hard while doing this Pranayama.
  • Practice it with the empty stomach or after 4-5 hours of the meal.
  • Do not put your finger inside the ear but, you have to only gently press the ear cartilage.
  • Menstruating or pregnant women should never practice Bhramari Pranayama.
  • All age people can try this breathing exercise including pregnant women.
Benefits of Bhramari Pranayama 
  • Bhramari Pranayama is a highly effective method for enhancing mental concentration and focus.
  • This pranayama can open the various energy blockages in our body; provide us with a feeling of elation, relaxation and happiness for the mind and body.
  • Bhramari Pranayam is very helpful in removing the heart blockages.
  • It is highly beneficial in resolving the signs and symptoms of hypertension.
  • It relaxes the mind and lowers stress.
  • The vibration of bee breathing has a special effect on our brain hence it is highly beneficial for all diseases like epilepsy, headache, migraine, hypertension, stress, anguish, panic attack, etc.
  • Bhramari pranayama is also useful for insomnia patients.
  • The breathing technique is extremely effective for men and women suffering from thyroid problems and insomnia.
  • It is a perfect breathing technique for managing Alzheimer’s disease.
  • Most effective Pranayama for awakening the Kundalini.
  • This breathing technique can stimulate the pituitary and pineal glands and improve their functioning.
  • It can improve and strengthen our voice, which is why it is highly recommended for singers and actors who need to use their voices articulately.
  • When practiced regularly, this pranayama can heal our bodily tissues.
  • It improves the quality of our sleep.
  • It can help to ease nasal congestion’s and heal sinus infections.
  • This pranayama offers a lot of spiritual benefits and can help to awaken Kundalini energy.

7 – Udgeeth Pranayama

Udgeeth Pranayama is the simplest form of pranayama and very helpful in improving concentration. It is also known as Omkari Japa which means chanting of Om. In this, one has to inhale and exhale slowly while chanting Om. While chanting Om, the ‘O’ should be 3 times longer than the ‘m’. This can be practiced for 5 to 10 times daily. The speed of respiration should be slow and subtle that you yourself may not be aware of its sound and even the piece of cotton placed in front of the nostril should not move by the effect of the air exhaled out. This pranayama is very helpful in relieving stress and depression. If this is practiced at bedtime, one will get peaceful sleep without any perverted dreams. Initially, in Udgeeth pranayama, the breath can be felt only in the nostrils but gradually it will be felt deep inside. This visualization of the breath and continuous chanting of Om will lead to Dhyan automatically. Your mind will develop a feeling of concentration and body will be filled with the feeling of Om.

How to practice Udgeeth Pranayama?
  1. Sit in a padmasana pose. Keep your spine erect and aligned in the head position. Keep your hands in Gyan Mudra.
  2. Breathe deeply through your nose till diaphragm is full of air.
  3. Then slowly exhale the breath from your nose in a very slow manner. With the exhalation, chant the word ‘OM’.
  4. Make sure that the sound of O should be longer than M.
  5. Your sound should be audible to you & concentration should only be on your breath.
  6. Repeat this process as many times.
Practice Tips
  • Take breath according to the ability of the body, do not practice it forcefully.
  • Try to do pranayama early in the morning before sunrise; doing so will give you more benefits.
  • Practice it with the empty stomach or after 4-5 hours of the meal.
  • If you feel tired during the exercise, rest for a while.
  • Do not practice pranayama by sitting in the wrong posture.
  • In this pranayama, the inhaling and exhaling duration should be long, slow and smooth.
  • Anyone can practice Udgeeth Pranayama including children of old age. You can practice this any time whenever you feel stress.
Benefits of Udgeeth Pranayama
  • OM chanting is beneficial in insomnia, stress, depression and all types of mental illness. It relieves tension, anger, and anxiety.
  • Udgeeth Pranayama is also beneficial in heart disease, hypertension, migraine pain, epilepsy, etc.
  • This yoga practice is also beneficial for patients with schizophrenia.
  • By chanting Omkar, the pains in the body can be erased, though the vibrations of Omkar.
  • It enhances the power of the brain, increases the concentration level, keeps the mind calm and steady
  • It detoxes the body.
  • Omkar chanting provides proper benefits even in autoimmune diseases.
  • It controls high blood pressure and disorder of kidneys.
  • It cures problems related to sleep and bad dreams.
  • It reduces falling of hair, premature greying, appearance of wrinkles, and diminution of eyesight.
  • Glow in the face and brightness of the eyes also increases. All types of diseases related to the throat are cured
  • Helps cure stomach problems — Gas, acidity and other stomach diseases
  • Cures nervous problems — practicing this pranayama removes all the problems related to the nervous system

8 – Pranav Pranayama

Pranav pranayama is one of the simplest breathing techniques among all. You can also say this, as 2 or 3 minutes instant meditation. People in all the age group can practice Pranav Pranayama. In Pranav pranayama technique, a person needs to focus on the sound of “Om” while breathing (inhaling and exhaling) normally in & out through nostrils. This process develops a moment of the piece in mind, which is a prerequisite for meditation & that’s why we call this breathing technique Om Meditation breathing.

Note: Udgeeth Pranayama is very similar to Pranav Pranayama as both breathing techniques revolve around a sacred syllable “OM”. Although both of them seem to be similar, there is a slight difference. While doing Udgeeth Pranayama you inhale with a deep breath and at the time of exhaling you chant OM (quite similar to Bhramari pranayama). When we perform Pranav Pranayama, we only focus on the word “OM”, not physically chant it.

How to practice Pranav Pranayama?
  1. Sit in a cross-legged comfortable position, close your eyes, your head should be straight & put your hands in Gyan mudra or Dhyan mudra.
  2. At first, focus on your normal breathing by observing the breath entering & leaving at the nostrils.
  3. Focus on your normal breathing as you inhale and exhale or while normal breathing you can also focus on the word Om in your mind.
  4. Become centered within yourself and feel your connection with the positive energies which is present in the Universe.
  5. Do this process for 2 or 3 minutes.
  6. After two or three minutes raise your hands above your head and rub your palms together for about 20 seconds.
  7. After that place your palms over your eyes, feel the warmness of your palms over your eyes.
  8. Now slowly – slowly open your eyes (don’t open your eyes immediately) with your hands still in front of your eyes.
  9. After that slowly lower down your hands and completely open your eyes.
  10. You can also increase the time limit from 2 minutes to 1 hour as per your available time.
Practice Tips
  • Pranayama should be done on an empty stomach.
  • While performing this Pranayama choose a place where you can get fresh air.
Benefits of Pranav Pranayama
  • Helps to reduce high blood pressure and heart problems.
  • With the help of this, mind becomes steady, lowers mental tension, agitation etc.
  • People who are suffering from migraine can get rid of it by the practice of this pranayama
  • It also relieves tension, anger and anxiety.
  • It is the excellent breathing exercise for meditation.
  • Effective against hypertension.
  • It cures problems related to sleep (Insomnia) and bad dreams.
  • Controls the high blood pressure and cures it.
  • This breathing technique is very useful for children with quick-temper, depression & anger.
  • It relaxes the mind and lowers stress level.
  • Helps in high blood pressure and other heart problems.

9 – Surya Bhedana Pranayama

Surya means the Sun and according to Yoga, the Surya Nadi is the right nostril. In this pranayama, you use your right nostril or Pingala for inhalation and the left or Ida one for exhalation.

A basic purpose of the right nostril breathing is to increase the pranic energy, physical energy and to revitalize the body. It boosts the nervous system, especially the sympathetic nervous system and also increases the efficiency of the digestive system Right nostril is Pingala Nadi, which represents the physical energy of a body. Breathing through right nostril is important for many important metabolic processes.

There are many reasons to do Surya Bhedana (Right Nostril Breathing) pranayama. By practicing a few rounds of Surya Bhedana pranayama each day for a few minutes can help us to control our conscious to some extent.

How to practice Surya Bhedana Pranayama?
  1. Sit in a comfortable pose. We advise you to sit with your backbone straight and make sure you fill breath in lungs.
  2. In Surya Bhedana (right nostril breathing) pranayama, inhalation is done only through right nostril and exhalation is done only through left nostril. The thumb is used to close the right nostril and the ring finger is used to close the left nostril.
  3. Choose a level of exercise, you can easily keep up with and breathe comfortably.

Set your value for inhale, exhale and hold.

A ratio of Inhale, Hold and Exhale is 1:4:2. The ratio 1:4:2 is mentioned in most classic yoga texts.

  • Inhale = x sec
  • Hold = 2exhale = 4x sec
  • Exhale = 2inhale = 2x sec

Pranayama beginners should start with the ratio of 1:1 for inhale and exhale. For instance, if you inhale through one nostril for 4 seconds, then the exhalation from the other nostril should also be for 4 seconds. As you progress, the ratio for inhaling and exhaling can be changed to 1:2, which means if inhalation is 4 seconds, then exhalation is 8 seconds.

Practice Tips
  • Do not try this if you have high blood pressure
Benefits of Surya Bhedana Pranayama
  • Surya Bheda Pranayama activates the body functions.
  • Very helpful for activating the digestive system
  • Best for awakening the Kundalini Shakti.
  • Surya Bhedana Pranayama cures all diseases that are caused by insufficiency of oxygen in the blood.
  • It cleans the frontal sinuses.
  • It can destroy intestinal worms.
  • Best for winter sessions.
  • If you feel cold in your feet or hands then try this.
  • It creates lots of energy.
  • This can boost the appetite.
  • It is the best breathing exercise for cold and cough, asthma, or other respiratory problems.
  • Best and simple method in low blood pressure.
  • It cures gas problem.
  • Useful in Leucoderma and other skin related problems.

10 – Chandra Bhedana Pranayama

Chandra is the Moon, Bhedana means passing through. In Chandra Bhedana Pranayama, left nostril is used for inhalation and right nostril is used for exhalation. It is said that on inhalation, energy passes through Ida (Chandra) Nadi and on exhalation through Pingala or Surya Nadi. These are larger nadis that hold the balance of energy created by the sun and the moon and the magnetism. They travel from the base of the spine to the point between the eyebrows. Chandra Bhedi (or Bhedana) is just the opposite of Surya Bhedi and activates the Ida Nadi that is associated with the cooling aspect and the parasympathetic nervous system.

How to practice Chandra Bhedana Pranayama?
  1. Sit in a comfortable pose. We advise you to sit with your backbone straight and make sure you fill breath in lungs.
  2. In Chandra Bhedana (left nostril breathing) pranayama, inhalation is done only through left nostril and exhalation is done only through the right nostril. The thumb is used to close the left nostril and the ring finger is used to close the right nostril.
  3. Choose a level of exercise, you can easily keep up with and breathe comfortably.

Set your value for inhale, exhale and hold.

A ratio of Inhale, Hold and Exhale is 1:4:2. The ratio 1:4:2 is mentioned in most classic yoga texts.

  • Inhale = x sec
  • Hold = 2exhale = 4x sec
  • Exhale = 2inhale = 2x sec

Pranayama beginners should start with the ratio of 1:1 for inhale and exhale. For instance, if you inhale through one nostril for 4 seconds, then the exhalation from the other nostril should also be for 4 seconds. As you progress, the ratio for inhaling and exhaling can be changed to 1:2, which means if inhalation is 4 seconds, then exhalation is 8 seconds.

Practice Tips
  • Do not perform Chandra Bhedana Pranayama in case of Asthma, low blood pressure, cough and cold and problems related to respiratory system
Benefits of Chandra Bhedana Pranayama
  • Helpful in reducing the body heat.
  • Useful in heart burning problems.
  • Very effective in high blood pressure.
  • Useful in reducing the fever.
  • Useful in reducing the tension, stress and other mental problems.

11 – Sitkari Pranayama 

Our mind and body often get stressed by the hot summer heat, which develops a sense of tiredness in us. In these long hours of summer heat, there are some yogic breathing techniques to soothe our body and mind. The term “Sitkari” is used in the Sanskrit language for ‘Hissing’ sound. In Sitkari pranayama, when air is inhaled in through gap present in the teeth, a ‘hiss’ sound is produced

How to practice Sitkari Pranayama?
  1. Sit comfortably in a cross-legged pose and align your back body in one line. To deepen the breathing effect, you can close your eyes and emulate Gyan Mudra with your hands.
  2. Now, gently press your upper and lower teeth together, and separate your lips comfortably so that your teeth get exposed to the air.
  3. Curl your tongue upwards so that lower part of tongue touches the upper palate. (If you aren’t able to curl your tongue, just rest your tongue at the back of the teeth)
  4. Now breathe-in slowly & deeply through the gaps present in the teeth. Feel the air is filling up your abdomen, followed by chest & neck portion in the end. During your breath inhalation, a small hissing sound will be made.
  5. Now close your lips (eventually mouth) and exhale through your nose slowly in a controlled way.
  6. This completes 1 round of Sitkari Pranayama, repeat 7 to 10 rounds
Practice Tips
  • When the surrounding air is too polluted, avoid doing sitkari pranayama.
  • Best to avoid the practice when ailments are related to the heart.
  • Best to avoid if suffering from migraine
  • Not to be practiced if suffering from very low blood pressure.
  • People who suffer from cough, cold, Asthma and Bronchitis should avoid practicing
  • Avoid sitkari who is suffering from chronic constipation or gastric problem.
  • Those who have sensitive teeth or gap in teeth should avoid it, as it can raise sensation in the tooth.
  • Sitkari pranayama is a good alternative for those who can’t roll tongue in Sheetali pranayama.
  • Sitkari Pranayama cools the body and is best done after the practice of daily yoga poses, bringing balance in the temperature of the body.
Benefits of Sitkari Pranayama
  • Sitkari Pranayama helps to reduce the blood pressure in the body
  • As this breathing cools the body temperature, it controls the parasympathetic and somatic nervous system and hence beneficial for those suffering from anxiety related issues.
  • Helps to keep the sugar in control and hence good for diabetes.
  • It’s shown in a research that sitkari pranayama positively affects the brain waves to relax the body.
  • Cooling effect coming  out of hissing breath positively impact on the nervous system and endocrine glands. This positive impact releases the emotional and psychological knots present in body and mind.
  • The cooling mechanism of Sitkari pranayama is very helpful for people who suffer from anxiety and hypertension.
  • Not only does it cool down the body, but it also clears extra heat out of the system by affecting those parts of the brain that regulate body temperature.
  • It helps calm down the mind by supporting mental composure.
  • Sitkari pranayama eases hyperacidity in the intestinal area.
  • It balances excessive pitta dosha and calms soreness all through the body.
  • As the tooth is exposed in the air while inhaling in this pranayama, It’s also considered beneficial practice for the good health of the teeth.
  • Its regular practice reduces hunger pangs & quenches thirst.
  • Sitkari pranayama is also very effective for inflammatory skin.
  • Those who practice it regularly start looking younger and more attractive due to it’s breathing exercise.

12 – Sheetali Pranayama 

Sheetali Pranayama, as its name suggests, is related to coldness. It provides coolness to our body. Hence it is also called Cooling Breath.

The word “Sheetali” is actually a Sanskrit word which means cooling. It is being taken from the original word “Sheetal” which means cold or soothing. There are great benefits of this pranayama. Sheetali Pranayama is an integral part of Pranayama. This enables both performing controlled breathing yoga and calming the mind for meditation. This pranayama should be done after all the yogasanas. By doing this, the body’s tiredness is removed. Apart from this, it also provides peace of mind. This pranayama is like a shady tree which produces plenty of oxygen.

The most basic purpose of Sheetali breathing technique is that it reduces the temperature of the body which does have a positive effect on the endocrine glands as well as the nervous system.

How to practice Sheetali Pranayama?
  1. Sit in a comfortable pose. We advise you to sit with your backbone straight and make sure you fill breath in lungs.
  2. Close your eyes.
  3. Now place your hands on the knees in Gyanamudra or Anjalimudra. Be calm, composed and in total peace.
  4. Then take out the tongue and fold it in such a way that it becomes like the shape of a tube.
  5. Then breathe slowly through the mouth through this tube. The air will pass through this tube to cool the mouth, palate and throat.
  6. Fill the stomach with air.
  7. Now turn the tongue inward and close the mouth.
  8. After this, by bending your neck forward, attach the front part of your jaw to the chest.
  9. Hold your breath by closing your mouth and nostril. (Do hold your breath according to your comfort level)
  10. Now straighten the neck from the back and let the air out of the nose.
  11. Try to exhale, exceed the time of inhaling.
  12. One can practice this pranayama ten times. After the practice of Pranayama, it can be extended in the summer season as per the requirement.
Practice Tips
  • If you are suffering from low blood pressure then you should not practice Sheetali breathing exercise.
  • In the winter season, if possible avoid practicing it.
  • Those who are suffering from constipation problem should avoid it.
  • Asthma, Cold and cough patients should not practice Sheetali pranayama.
  • Heart patients should not hold breath for a long time.
  • You may also feel a little bit of cold or tingling sensation in your throat due to the cold air, but this is normal.
  • In case you feel dizzy then you should stop the practice of this pranayama and start the normal breathing.
Benefits of Sheetali Pranayama 
  • Sheetali Pranayama is useful in diseases which related to tongue, mouth and throat.
  • It is very beneficial in diseases of spleen.
  • Helpful in fever and indigestion.
  • Controls the High B.P.
  • Effective to calm down pitta in the body.
  • Plays an important role in the purification of blood.
  • Makes our body cool due to inhaling through the rolled tongue. It decreases the heat in the body.
  • Improves the quality of Sleep and cure insomnia.
  • One of the best breathing exercises to calm your mind and body.
  • Effective in hyper-acidity.
  • It helps in the control and removal of hunger and thirst.
  • This practice of Pranayama helps in keeping the digestive system fine. If our digestion is good, then all stomach related diseases can be got rid of.
  • By practicing this pranayama regularly, you can get rid of your eye problem soon.
  • By practicing this pranayama, we can reduce the mental and emotional excitement and spasticity of mind.
  • Complaints of excessive sweating also provide relief.
  • This pranayama is like a shady tree which produces plenty of oxygen.

13 – Karna-Rogantak Pranayama

Around 37% of the people in today’s scenario suffer from the problems pertaining to ears. They themselves may not be aware of their problems and hence, they do not take any steps to cure them. The most common ear related diseases can be partial deafness, infection of the ears internals, and the partial or full blockages inside the ear tubes.

There is a very effective way available with all of us to cure such deafness without any harmful medicines and that is through the simple pranayama technique. The best suitable pranayama to treat ear problems is known as Karna-Rogantak pranayama. If this simple exercise is performed regularly on daily basis, the hearing power of the ears increase and the dumbness problem of the individual could be cured.

How to practice Karna-Rogantak Pranayama?
  1. Sit in a comfortable pose. Keep your eyes lightly closed without any indications of stress on your face.
  2. Now place your hands on the knees in Gyanamudra or Anjalimudra. Your face must appear cool, calm, composed and in total peace.
  3. Breathe deeply through your nose till diaphragm is full of air.
  4. Close both the nostrils with the right hand thumb applying slight pressure
  5. Keep your mouth also shut. Now, try to breathe out the inside air through closed mouth as if you are trying to push the air through your ears. This exercise will pressurize the ear drums suitably and the impurities collected since long inside the ears would get thrown out through the ear openings.
  6. Repeat this exercise for around 4 to 5 times.
  7. Then, breathe out through both the nostrils in a normal way but very slowly and gradually.
  8. This pranayama also must be performed either in the early morning hours or during the evening hours with empty stomach and with the clean bowels.
  9. Initially, you may experience slight difficulties in trying to simulate pushing out the air through the ear openings, but gradually, you will get used to this and the ear drums shall get pressurized suitably while pushing some of the entrapped air outside through ears.
  10. The procedure of performing this pranayama is slightly special and it may need few days before you become used to performing this pranayama. However, continue practicing it without any break for around two weeks initially and you will be able to practice this pranayama easily thereafter.
  11. You must make sure not to release the air through your mouth as the mouth will have a strong tendency to open at the time, while you are trying to push the inside air through the ears.
  12. Practice slowly and with patience initially for few days. However, do not stop doing this pranayama during that initial period as otherwise it may be difficult to get in to the rhythm later on
Practice Tips
  • People suffering from ear leakage, red eye problems, and those who have undergone ear and eye surgery in a year should not practice this pranayama.
  • The best time to do this pranayama is in the morning when people’s stomach is usually empty and the intestines clear.
Benefits of Karna-Rogantak Pranayama 
  • Regular practice of this pranayama helps in getting rid of diseases related to ear.
  • By doing this pranayama, blood circulation and hearing senses become more active in the ear vein.
  • It also helps to a great extent in curing the problem of deafness if practiced regularly
  • This pranayama is very important for all diseases of the ear and at the same time the mind gets concentrated due to its attention.
  • Benefits those children who do not study diligently
  • It also proves very beneficial in problems like depression, headache, and migraine

Sign up for our newsletter and special offers


    By subscribing you agree to receive our newsletter and related offers


    Accreditation | Recognition

    Dun & Bradstreet, headquartered in Jacksonville, Florida, offers information on commercial credit as well as reports on businesses. Most notably, it is recognizable for its Data Universal Numbering System (DUNS numbers); these generate business information reports for companies around the globe. Click here to view listing.


    Bisnode is a company that offers decision support in the form of digital business, marketing and credit information. Founded in 1989, Bisnode is now a Dun & Bradstreet company. Bisnode is present in 19 European countries and has its headquarters in Stockholm, Sweden. Click here to view listing.


    Disclaimer: Content of this website is for information purposes only. Some of the images/videos could be solely for representation purposes. Please note the date of last review or update on all articles and other content. No content on this site or on any of HealthySpan’s social media handles, regardless of date, including but not limited to, live fitness sessions etc., should ever be used as a substitute for direct medical advice from your doctor, other qualified clinician or a certified fitness trainer. HealthySpan Wellness does not claim to treat any disease nor does it claim that any organic nutrition or any other aspects narrated can do so. Appropriate lifestyle habit modifications are not a substitute for medical treatment. However, HealthySpan Wellness believes lifestyle disorders viz. obesity or other obesity-related disorders can be effectively managed by positive changes to lifestyle habits, viz., diet, nutrition, exercise, sleep, developing a positive mental attitude. No one can guarantee different individuals will have same results. Individual experiences with the wellness programs may vary. Please read ‘Terms and conditions of use’ and ‘Privacy policy’ for further information.

    HS_Logo_White

    Lifestyle disorders are in epidemic proportions now. It is time, we recognize this monster we are up against as a society and take some manifest and decisive actions. This monster affects us all - prematurely in many cases, shortening healthy life span & productivity. Many of us are, living long –long life attributable to significant strides made in modern medicine. However, for many, the years in the long life are devoid of optimal health. At HealthySpan Wellness, we are resolute in our determination to confront this menace through our holistic wellness programs such as healthy weight loss program, that provide assistance in fighting such lifestyle disorders.

    Recent Articles

    Copyright © 2020 - 2021 HealthySpan Wellness Private Limited. All Rights Reserved. The HealthySpan word mark is a registered trademark of HealthySpan Wellness Private Limited in India and other countries. The HealthySpan with Device of “HS” is a registered trademark of HealthySpan Wellness Private Limited in India. Use of this Site is subject to express terms and conditions of use. By using this site, you proclaim that you agree to be bound by these Universal Terms and Conditions of Use.